Link for photos of this trek on Flick
Link for blog post about other hikes in South Greenland
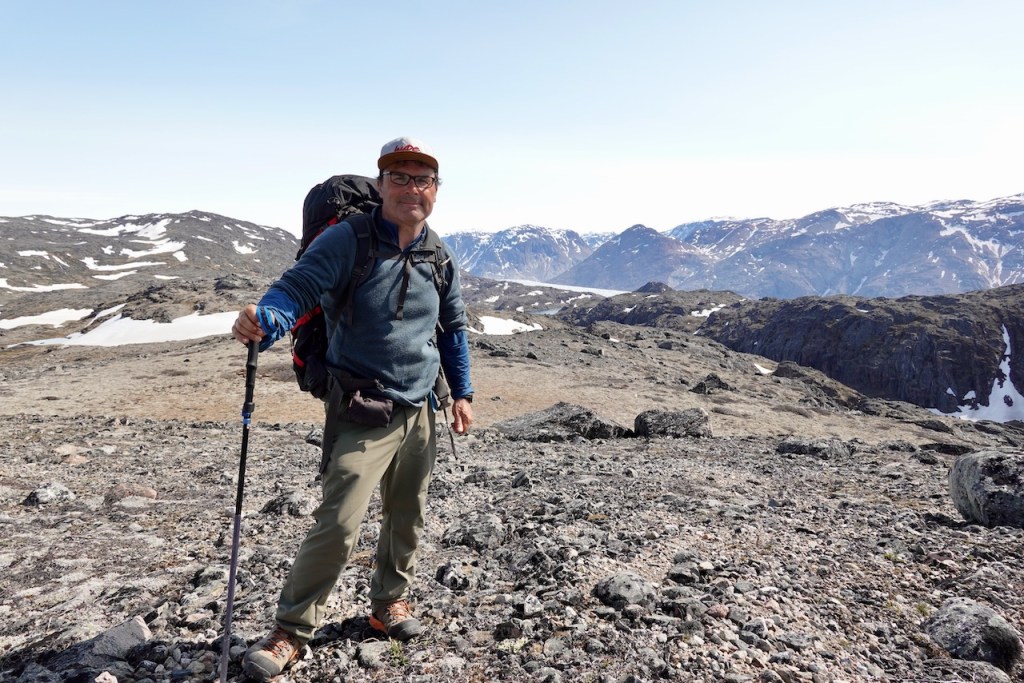
This post describes a loop trek starting and ending in the small town of Narsarsuaq in South Greenland. It extends the classic day hike to the glacier viewpoint with a couple of nights of camping on the high plateau next to the town. We took our time and did the loop in 4 days / 3 nights but you can easily do it in 3 days / 2 nights as well.
Narsarsuaq
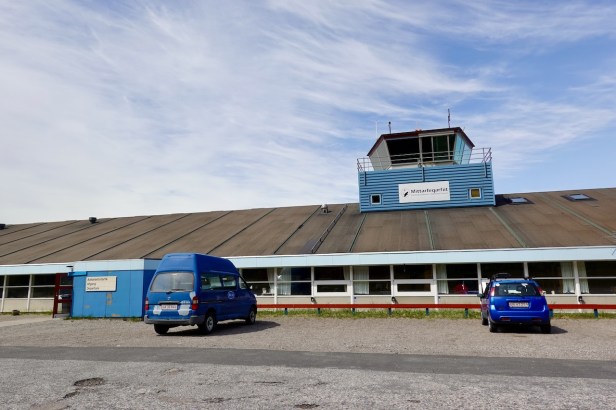
Narsarsuaq is a major transport hub in Greenland. In world war II it was known as Bluie West One and served as the main stopover for airplanes going from the US to Europe. Today it has been converted into a civilian airport serving both international flights to Denmark and Iceland as well as domestic flights for South Greenland.
The village itself is tiny: it is not much more than a hotel, a hostel, a supermarket, a cafe, a very interesting museum, and some housing blocks housing the staff of said places.
The airport in Narsarsuaq is scheduled to be closed, possibly as soon as 2026. International flights are already being moved to the new airport in Nuuk and domestic flights will be moved to the new airport which is under construction in Qaqortoq. Once the Narsarsuaq airport is closed, it remains to be seen what will happen with the hotels, ferry services, shops etc. in Narsarsuaq.
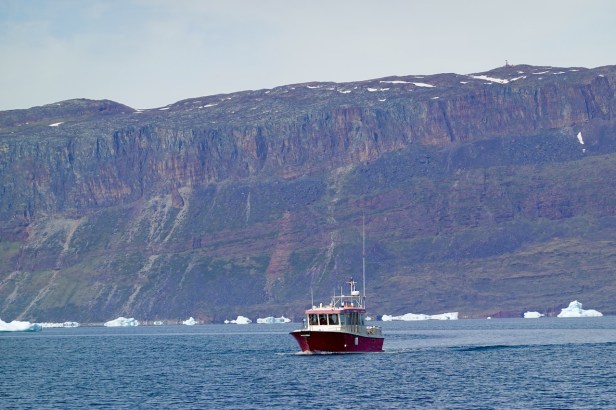
Narsarsuaq is easy to reach. There are frequent ferries services to nearby towns by Disko Line and Blue Ice Explorer and there are frequent domestic and international airplane and helicopter flights. Make sure your travel plans are flexible and include some slack time because delays and cancelations are very common. We have also heard reports that people who book an international flight to Narsarsuaq were rebooked to Nuuk and then a domestic transfer to Narsarsuaq.
There are two accommodation options in Narsarsuaq.
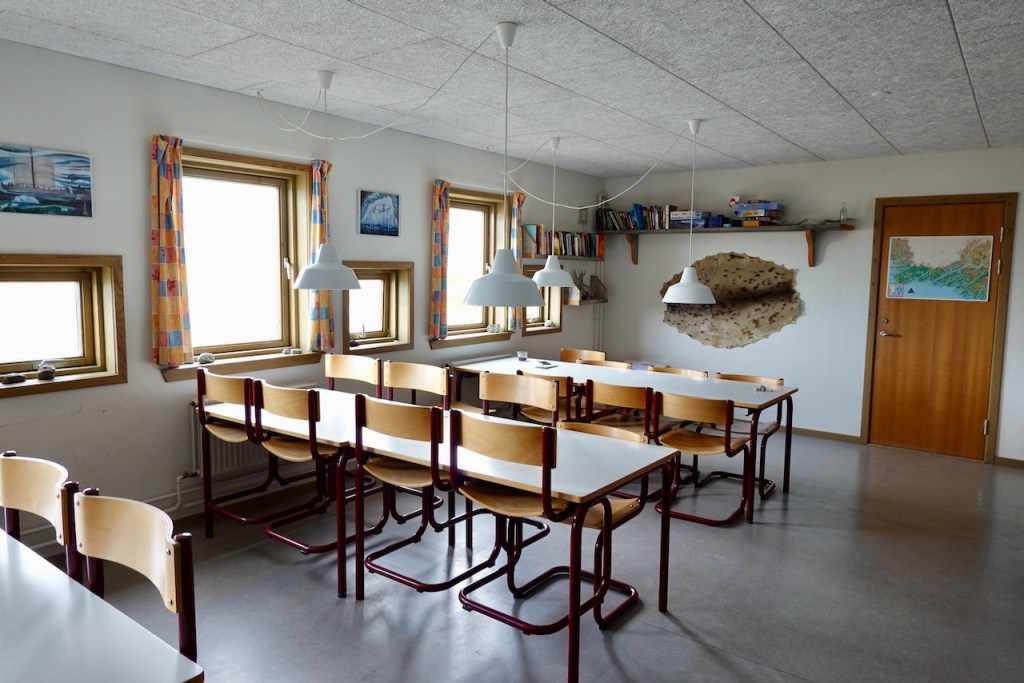
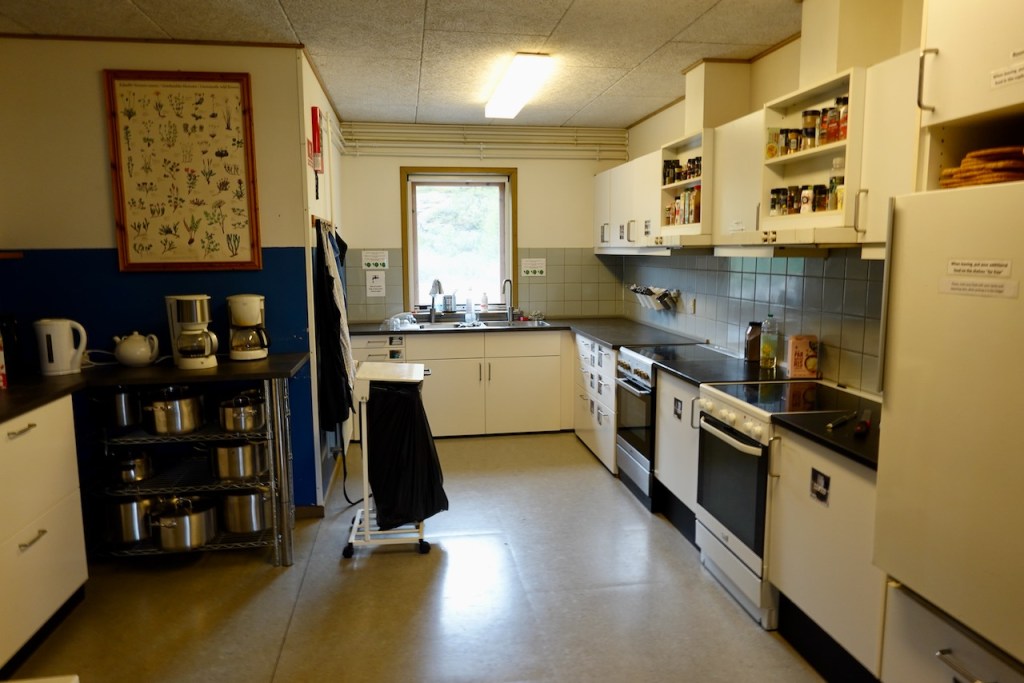
We spent one night after the hike in the hostel, which is a couple of hundred meters inland along the road from the airport. It has multiple rooms, each with two bunk beds (four people per room). The facilities are very clean and good. There are clean shared toilets and shared showers with strong hot water and paid laundry washing machines. There is a large well-equipped kitchen for self-catering (there is a well-stocked Pilersuisoq supermarket on the opposite side of town). And there is a large and comfortable living room with dining tables and seating areas with lots of information.

The other option is Hotel Narsarsuaq, which is right next to the airport.
Both the hostel and the hotel arrange pickups and drop-offs to the ferry dock which is about two kilometers outside of town.
The Blue Ice cafe is close to the airport. This is where you can book Blue Ice ferry tickets (you can also do it online). In addition to good coffee and pastry, they normally also sell gas canisters, freeze dried meals and maps. The staff is super friendly and helpful.
Make sure you visit the small museum which is attached to the Blue Ice cafe; it has very interesting historical photos.
Navigation
A large section of this trek is completely without trail. There is a trail to ascend to the top of the plateau. And once your reach the emergency shelter on the Northern side of the plateau, there are sometimes faint trails to the glacier viewpoints and back down into the valley and back to Narsarsuaq. But on the plateau itself, for most of the first and second day, there are no trails whatsoever. You must be completely self-sufficient and confident with off-trail navigation. There are no major river crossings on this trek.
We found the following GPS track recordings and paper maps useful:
- This wikiloc trail recording (recorded by Birgitte who can often be found in the Blue Ice cafe) shows the exact location of the trail that goes up from signal hill up to the plateau. There is a clear trail that was created by scientists going up and down for a research project. Only follow this trail to the top of the plateau at an altitude of about 400 to 450 meters (not all the way to the top of the 970 meter high mountain top which is the destination of the recorded trail).
- This wikiloc trail recording (recorded by Torben Veng) shows includes the route described in this blog. It also covers a much larger trek from Itilleq to Qaqortoq which we also hiked and describe in a separate blog. Note that the waypoint sampling rate for this GPS recording is very coarse, so take the route with a grain of salt. It seems that Torben chose to follow the right-side ridge on the plateau; we instead opted the follow the left-side ridge which is on the other side of the gorge that separates the two ridges (more details in day 1 below).
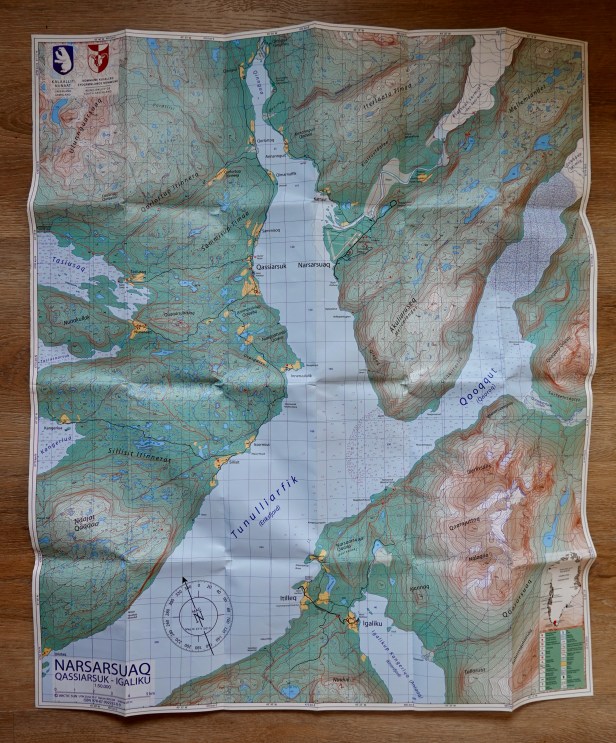
- Arctic Sub map Narsarsuaq (Qassiarsuk – Igaliku). ISBN 978-87-992925-0-9 covers the area in excellent detail. We purchased this map at cafe Thorhildur in Qassiarsuk (which is run by Elna from Sillisit sheep farm).
Note that wikiloc allows you to download GPX files which you can then import into your favorite GPS app (we use Gaia and OsmAnd). Make sure you download the maps and the tracks for offline use in your app (which requires a paid subscription) because there is no cell phone service on the trek. We also strongly recommend you bring a satellite communications device (such as a Garmin InReach) for emergencies.
Day 1: From Narsarsuaq to wild camping spot on plateau
We strongly recommend that you do this trek anti-clockwise (as described here in this blog), taking the steep trail up to the top of the plateau first, then following the top of the plateau North-East to the emergency shelter and the glacier viewpoint, and finally coming back to Narsarsuaq through flower valley. The reason for this is that the trail up to the plateau is relatively easy to find from the bottom but nearly impossible to find from the top. If you miss the trail, getting up or down the plateau will be a miserable steep bushwhack through dense bushes.
To get to the trail up to the plateau, start from the hostel (the last big red building on the tarmac road heading North-East out of town) and follow the dirt road that takes you towards the top of signal hill (the hill with antennas on top, visible from anywhere in town). Just before you reach the top, you will find an abandoned concrete building. From here, there is a well-defined path first going East and later South-East that takes you to the top. When you get to the first clearing in the bushes after a couple of hundred meters, look to the sharp right of the clearing to find the continuation of the trail. The last part is a bit steep, but it’s not difficult. Birgitte’s wikiloc track recording which we mentioned earlier shows the exact route.
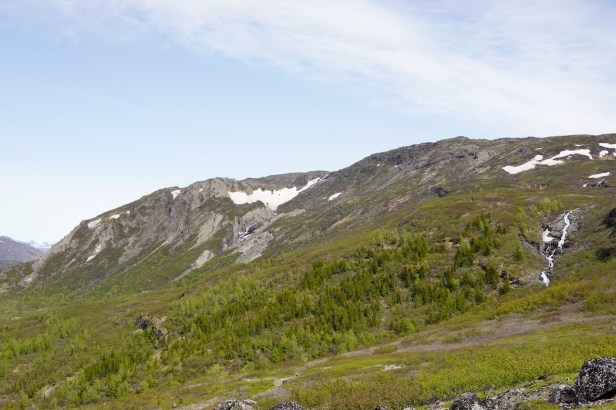
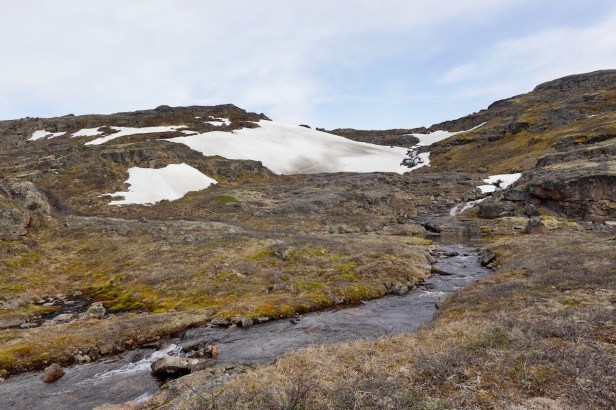
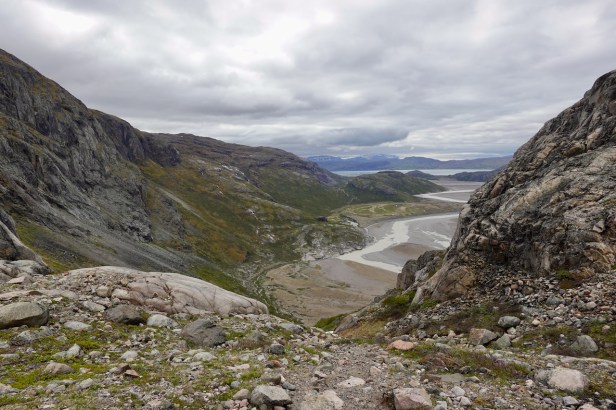
The trail up to the plateau goes through the following area, up along the right side of the river that you see in the right side of this photo:
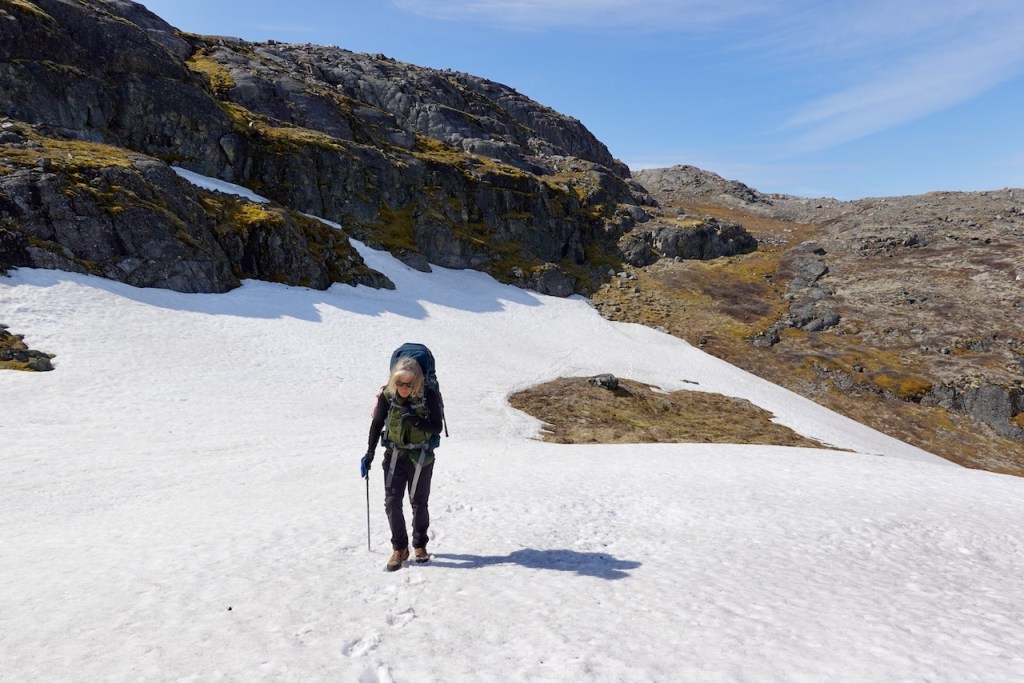
Once you reach the “plateau” the trail slowly peters out and from there on there are no more trails anywhere on the plateau until you reach the emergency shelter and the glacier viewpoint on day three. I put “plateau” between quotation marks, because (unlike the Qassiarsuk and Igaliku area) the plateau is not flat at all; there are lots of ups and downs and (in May) with steepish sections and snow patches to navigate around.
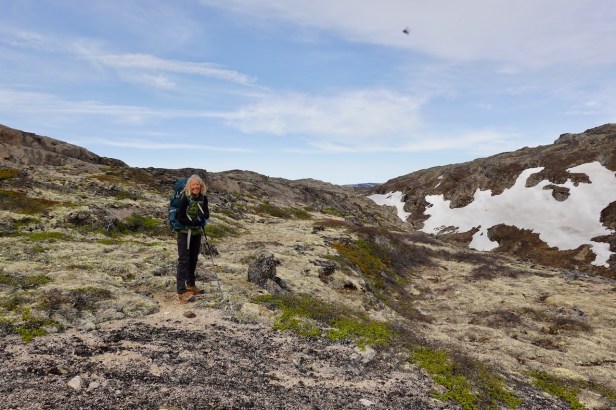
Photo of the trail petering out when getting close to the top of the plateau:
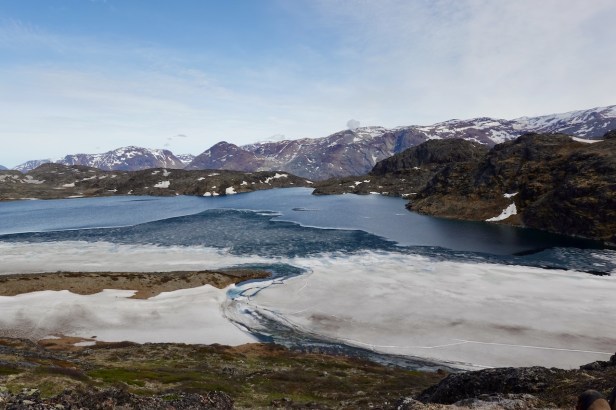
From the end of the well-defined trail, start heading North-East to follow the ridge for the rest of the day and the next day. There isn’t any trail to follow, but the necessary direction is sort of self-evident. Just stay at roughly the same altitude of around 450 meters, following the ridge line. There is a South-West to North-East gorge in the middle of the plateau filled with lakes and lingering snow patches (the source of an evidently hellish mosquito population later in June – there were none in May). Going North-East, you can follow the ridge on either the left side or the right side of this gorge. We went the left side, which is lower and seems easier.
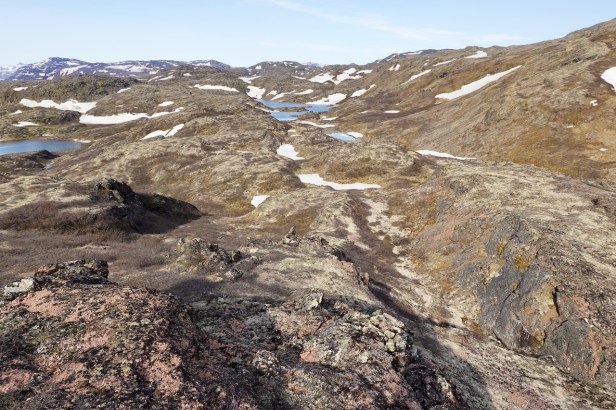
Photo of the “plateau” once you reach the top. You can see the beginning of the gorge on the right side. The gorge gets deeper and wider as you progress North-East during the day.
For the rest of the day, you just follow a North-East heading, keeping the increasingly deep gorge on your right-hand side, and staying at the same altitude of roughly 450 meters.
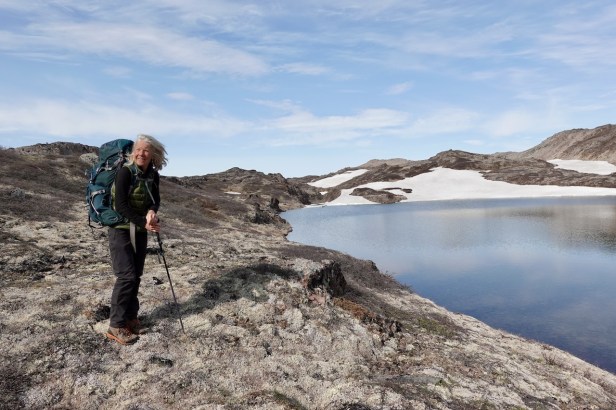
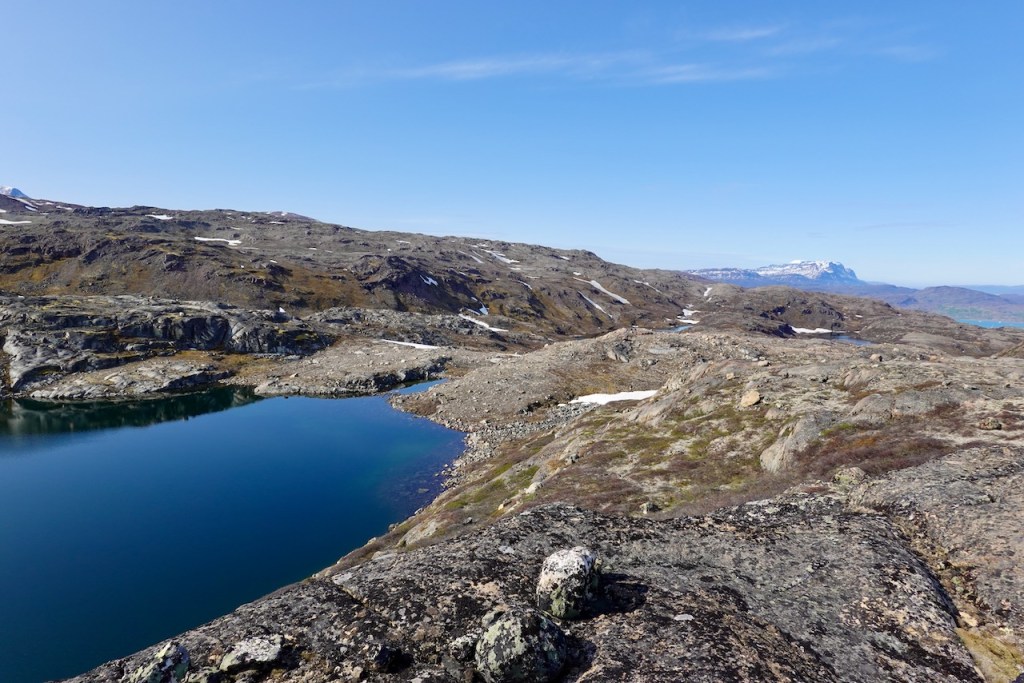
The landscape is rough, austere, and rocky. There are lots of small and large lakes. There is quite a bit of up and down and detouring around lakes and snow patches. But, in general, the hiking is not too difficult: there are no bogs or bushes.
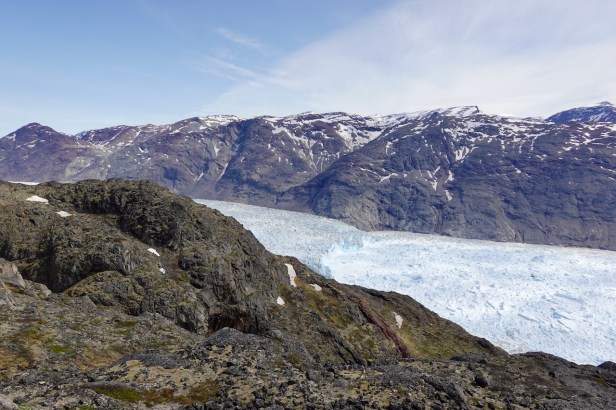
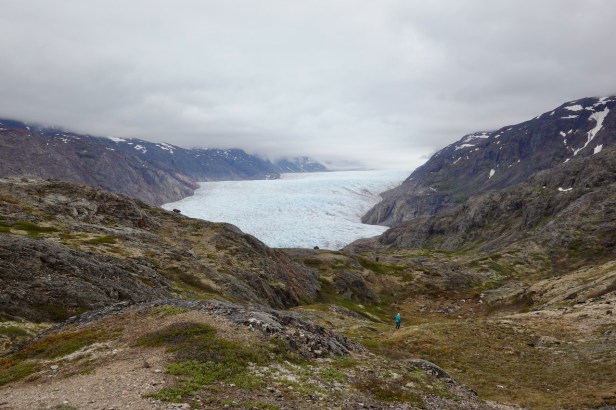
Here are some photos of what the landscape looks like for the rest of the day. Note that you can already see one of the two glaciers in the distance on the left side. You will see this glacier (and another even bigger one) up close on day three.

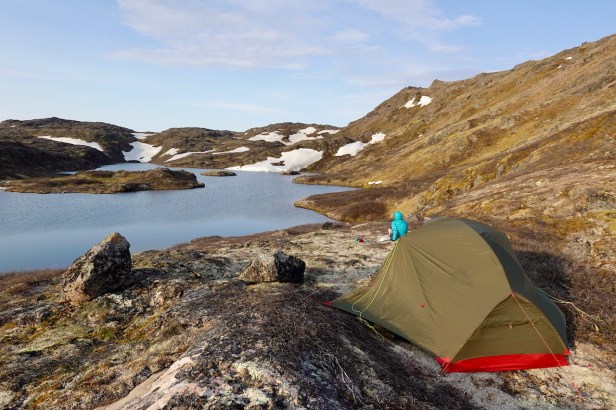
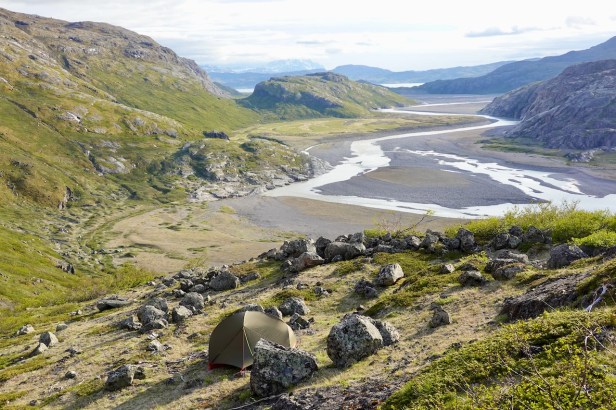
Because we only arrived by ferry that same morning and spent some time chatting and drinking coffee at Blue Ice Cafe, we only started hiking around 3pm. We stopped hiking and setup the tent for the night at 7pm (still broad daylight) at a beautiful viewpoint next to one of the numerous lakes.

Day 2: From wild camping spot on plateau to wild camping spot near shelter and viewpoint. Visit Qooqqup Sermia glacier viewpoint.

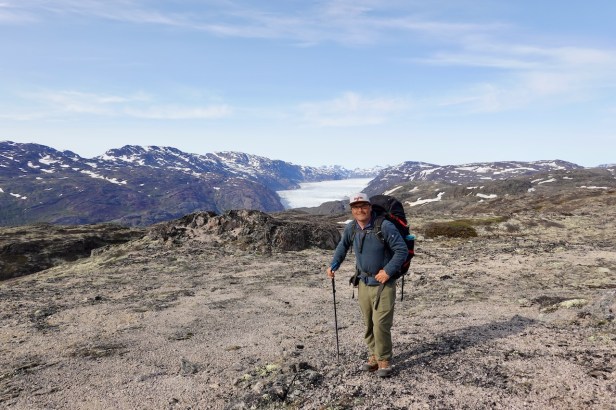
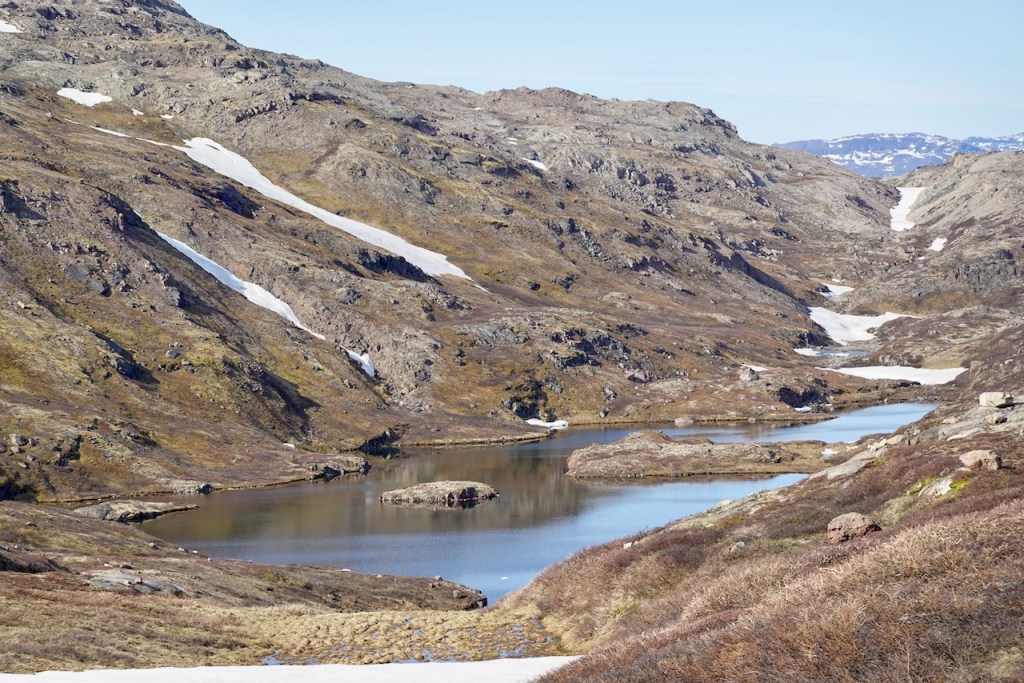
After breakfast, we continued hiking on the plateau in the same North-East direction, following the gorge which continues to get deeper and wider. While the hills on the left side (where we were going) continue at the same altitude of 400 to 500 meters, the hills on the other (right) side of the gorge become distinctly higher.
The landscape looks like this:

After about four hours we reached the emergency shelter which is marked on the map. The shelter is not particularly attractive, but it serves as a good navigation waypoint and it is functional in case of emergency.
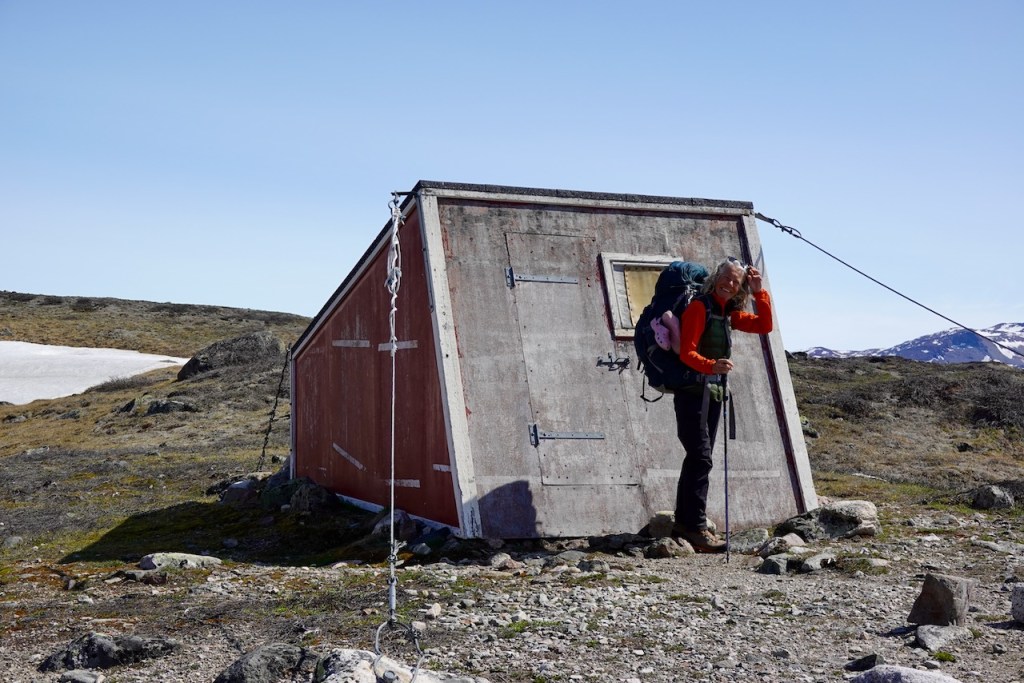
We dropped our packs at the hut and continued to one of the glacier viewpoints without pack.
There are two glacier viewpoints on this trek:
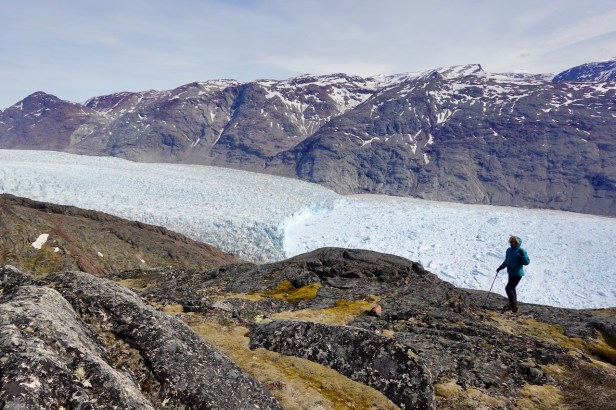
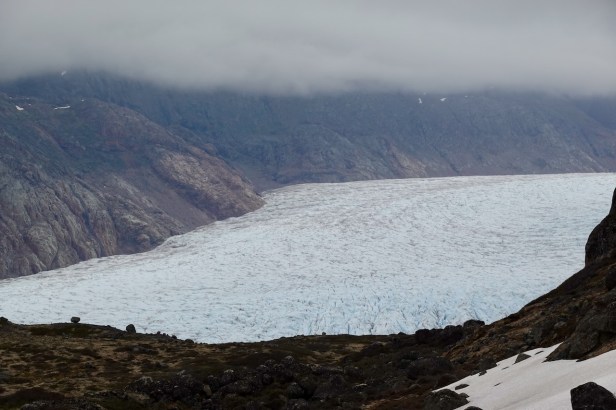
- The viewpoint of Qooqqup glacier which is South / East of the ridge. This is the biggest and most spectacular glacier. This is the viewpoint that we are visiting today. The viewpoint is on top of a cliff about 500 meters above the glacier deep below.
- The viewpoint of Kiattuut Sermiat glacier which is North / West of the ridge. There is one viewpoint observing the glacier from high above and another viewpoint where you are right next to the ice. We will visit both viewpoints on day three (tomorrow).
You can also continue further North-East on the ridge to the point where the two glaciers split off from an even larger combined glacier. But this would have added another two days to the trek, so we didn’t have time for it.
To get to the viewpoint head straight East from the shelter. Soon, you will see a gigantic lake with a river coming in from the South-West feeding it.
You have to head down and cross that river (in early June it was easy to boulder-hop across). If you head straight East for the river, it is a steepish descent with some minor scrambling involved. It is better to loop around the North side towards the West side of the lake. That is much less steep. There is a trail marked by cairns there, but it is very faint and we did not notice it until we returned back from the viewpoint.
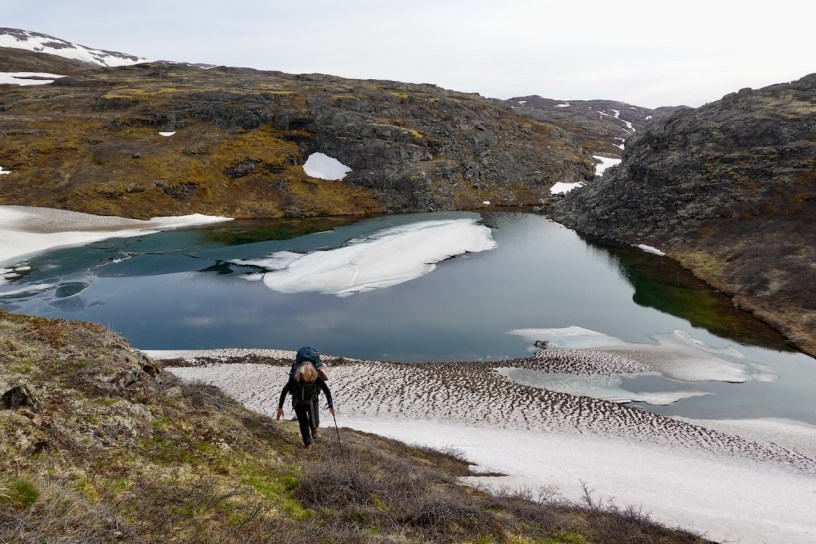
This photo is at the side of the lake looking back towards where we came from. The less steep trail is on the grassy slope on the left side of this photo.

Once you cross the river, there is a very clear trail up onto the ridge on the other side which takes you to the viewpoint of the glacier. It is worthwhile to continue a bit further South beyond the viewpoint marked on the map to get an even better view.
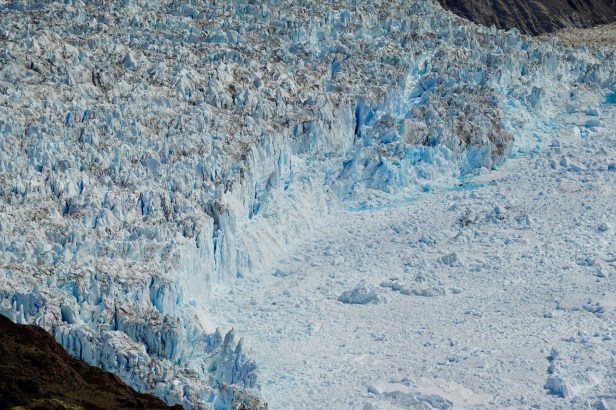
Here are some of the views from the viewpoint:
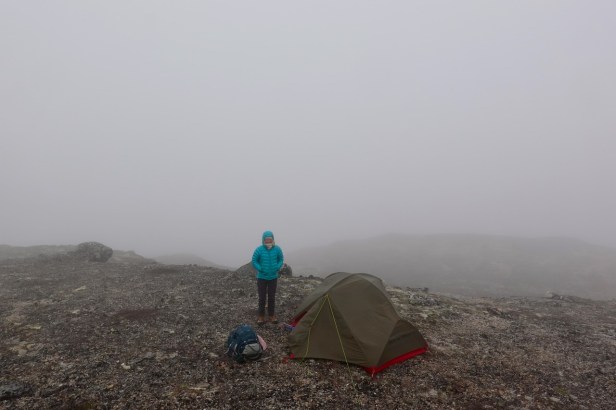
After returning back to the shelter from the view point, we retrieved our bags and put up our tent on top of a hill a couple of hundred meters beyond the emergency shelter, where the view was much nicer. This photo was taken the next morning, when a dense fog had rolled in:
Day 3: From wild camping spot near shelter to wild camping spot on trail down to flower valley. Visit Kiattuut Sermia glacier viewpoint.
From the shelter there is a trail heading West back in the direction of the point where you descend back into the Narsarsuaq valley. The trail initially is clear and marked with red dots, but it goes faint and we lost it a couple of times. In the morning there was a dense fog (we really needed the navigation app) but it cleared up as we descended to below the clouds.
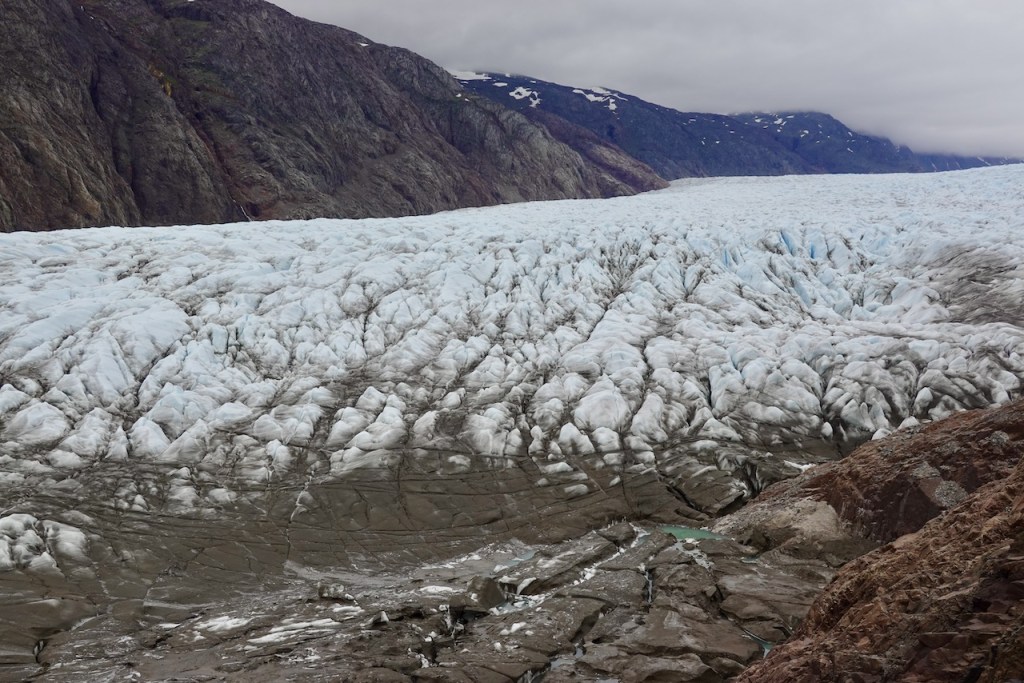
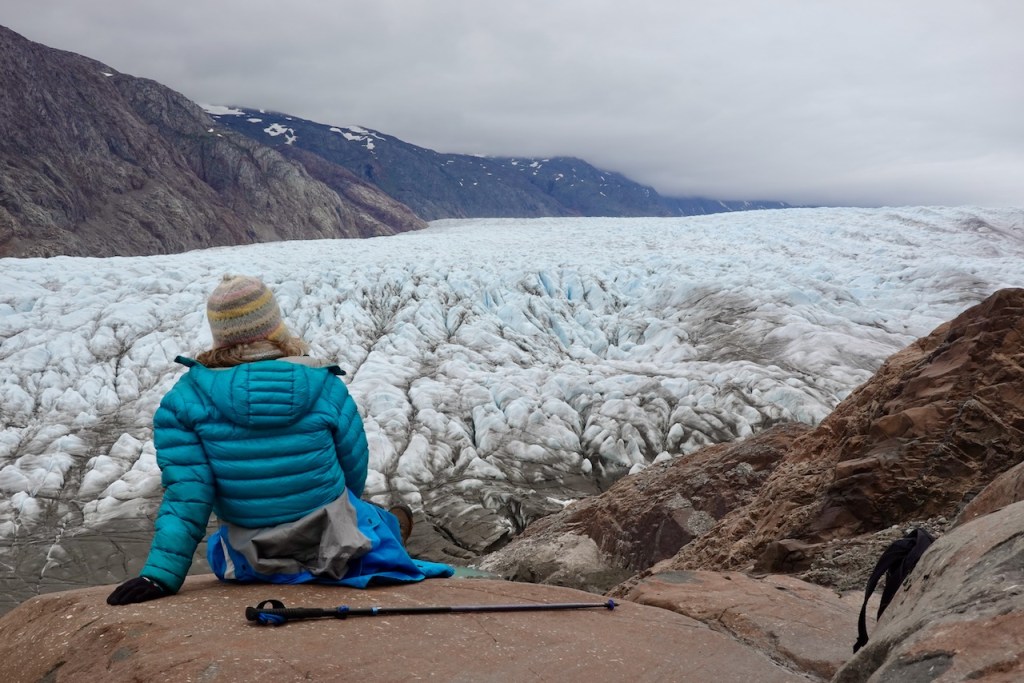
After about two hours we reached the high viewpoint of Kiattuut Sermia glacier, which is clearly marked on the map close to a largish lake.
From there, there is a very clear trail that descends about 250 meters to another viewpoint which is right next to the ice of the glacier. We dropped our packs and started heading down.
From the low viewpoint we made our way back up to the high viewpoint and picked up our bags.
We followed a clear trail South-West and soon reached the point where the trail descends back down into the valley and the final few kilometers back to Narsarsuaq.
We could easily have made it back to Narsarsuaq that same day, but as we made our descent from the plateau towards the valley, we found one flat spot halfway down next to the river. We decided to pitch our tent here for one extra night to enjoy the last of the views.
Day 4: From wild camping spot on trail down to flower valley and back to Narsarsuaq
From our camping spot we descended into the valley. The descent is a bit steep. There are ropes to help you, but it wasn’t so steep that the ropes were really needed. Once we reached the valley, we noticed that there is a new alternative trail (marked with brand new red dots) a bit further north that is a bit less steep.

Once at the bottom of the valley, we made a brief detour, looping back to the right following the cliff, to reach a viewpoint looking at the face of the Kiattuut Sermiat glacier marked on the map. We did not really get a great view of the glacier – that would have required crossing the meltwater river which was impossible this time of year.
We followed the trail South-West along the valley through the so-called flower valley, which is a popular camping view. (Personally, I’d say that the camping spot where we camped at the end of day 3 was much nicer.) There are actually no flowers in the flower valley anymore; they valley has been converted into grass field for hay production many years ago.
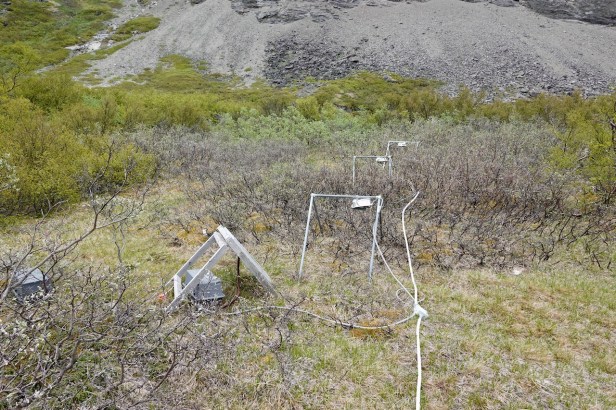
Shortly after the flower valley, the trail changes into a gravel road that crosses a last small hump. You will pass some experiments left behind by climate scientists. Soon after the gravel road changes into a real tarmac road, and the last few kilometers into town are a bit of a boring slog.