
Introduction
In the first week of August 2025 we did a seven-day 110 km trek from Kapisillit to Nuuk, plus an extra day to visit the ice fjord north of Kapisillit.
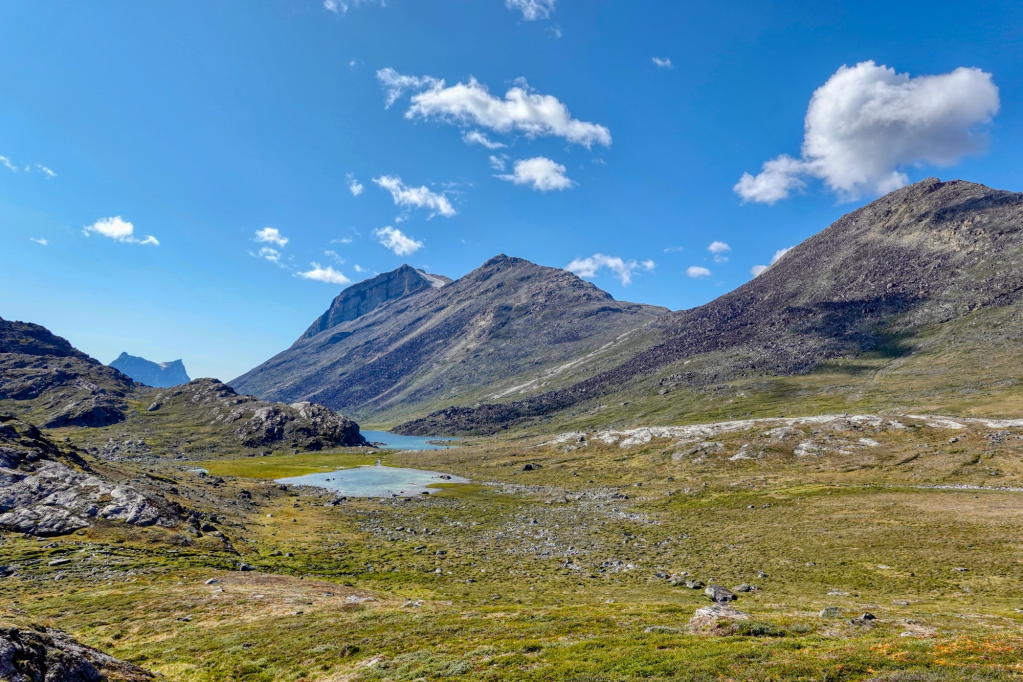
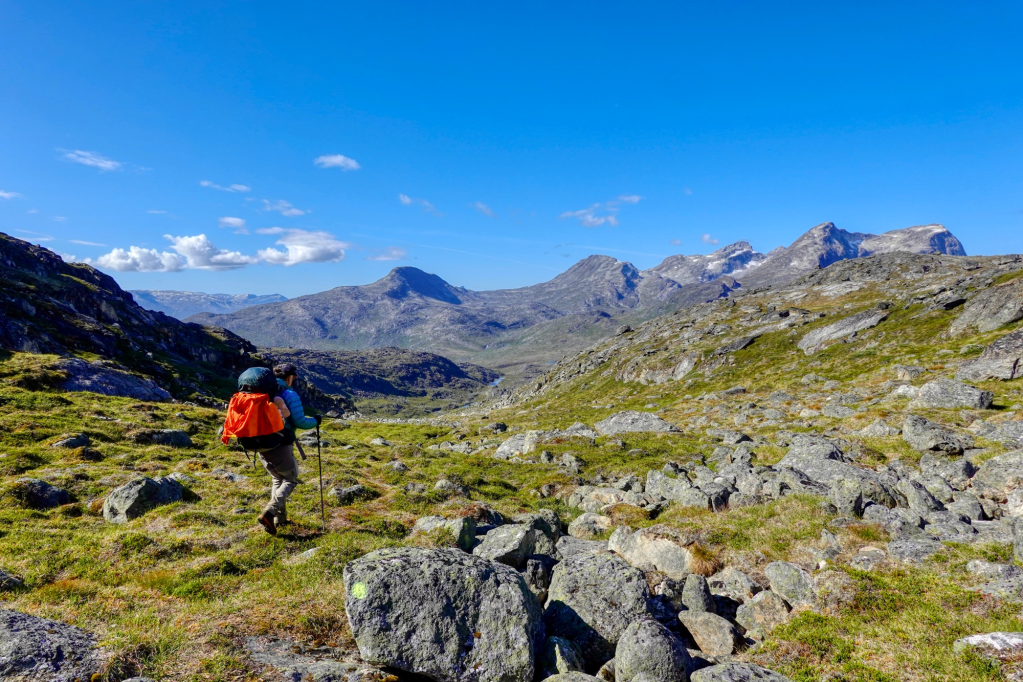
This was, by far, the most scenic and the most challenging trek that we have done so far in Greenland, including hikes in sheep country in South Greenland and several hikes in West Greenland such as the Arctic Circle Trail (ACT).
The Kapisillit to Nuuk trek was more scenic because it passed through high rugged mountains, whereas other hikes tend to pass through rolling green hills or lower, tamer mountains. It was much more remote and less crowded than the ACT.
And it was more challenging because there is a lot more up-and-down, there are several long stretches that require boulder-hopping, there are a couple of steep sections, there is one very challenging snow wall to descend, and many sections are without trail (but with markers).
On the other hand, it is shorter than the ACT (110 km versus 160 km) and it is not nearly as boggy as the ACT, although that may be due to the fact that we did the ACT in early July and Kapisillit to Nuuk in early August.
Navigation
On some parts of the route (I would estimate about 40%) there is a very clear trail. On other parts (about 30%) there is a faint trail. And on the remaining part (about 30%) there is no trail at all; you are either following the beach or just walking through tundra without any trail.
GPS tracks are available on the Visit Nuuk website. We were able to download and install the GPS track in our OsmAnd phone app but we got an error message when we tried to install it into our Gaia phone app.
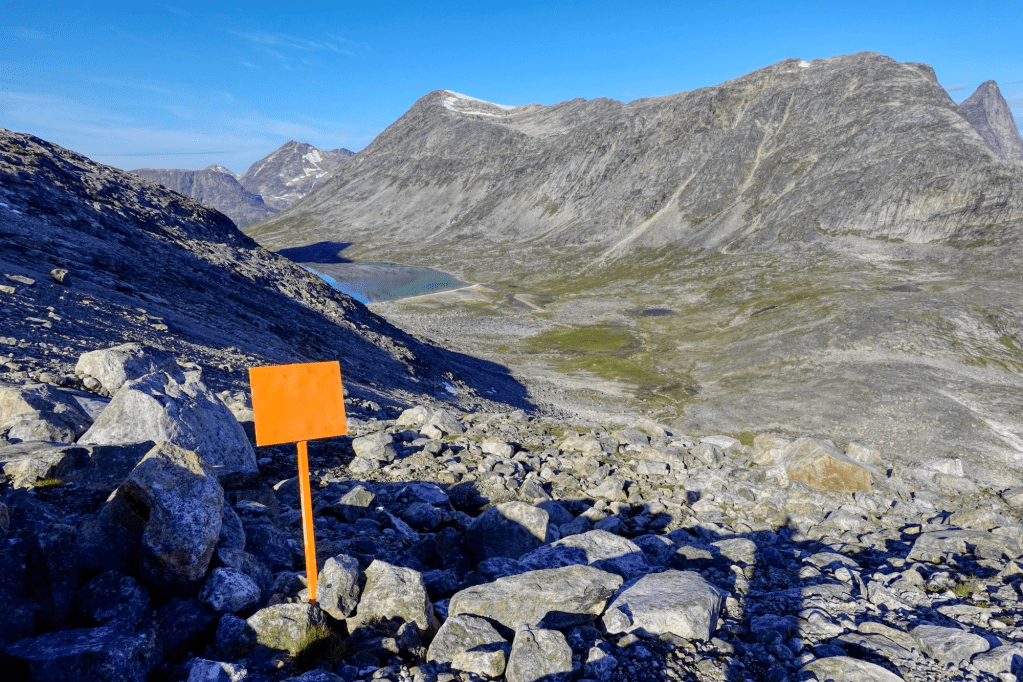
In the summer of 2024, Visit Nuuk in collaboration with Valdemar Wilhjelm Geisler did a project to mark the route for hikers. We did indeed find that the whole route was marked with bright yellow dots. They are not always clear, and they are easy to lose (it doesn’t help that they are a very similar color, size, and shape as the patches of moss that are present on many stones) but they are there, and they are an enormous help to follow the route. If you lose the dots (which we frequently did), the GPS tracks from the Visit Nuuk website follow the marked route exactly and can be used to find your way back to the marked route.
The Pikkori Sport store in Nuuk sells the excellent “NuukKap Extreme Running Race map” by Mark T Hutchison that shows the whole trail in great detail.
In Greenland we also often used the Avenza maps phone app (app is free, but you have to pay for map downloads) but for this particular trek the suggested routes on the Avenza map don’t line up with the markings, so we did not use it in this case.
Safety
This is not a trek for beginners; you should be a confident hiker experienced with multi-day off-trail hikes. Some parts of the terrain are quite challenging.
There are several ups and downs with vertical ascents or descents of between 400 and 700 meters. Many of these are very rocky and have no clear trail (but they do always have the new yellow dot markings). Some of them are quite steep. In particular on the second-to-last day on the Nuuk side, there is a steep 50+ meter high snow wall that persists the whole year and requires a good head for heights to ascend or descend (more about this in the detailed description).
There are several river crossings. Most can be boulder-hopped. A few need to be forded. None of them were challenging in early August, but it’s good to bring crocs or similar river crossing shoes anyway.
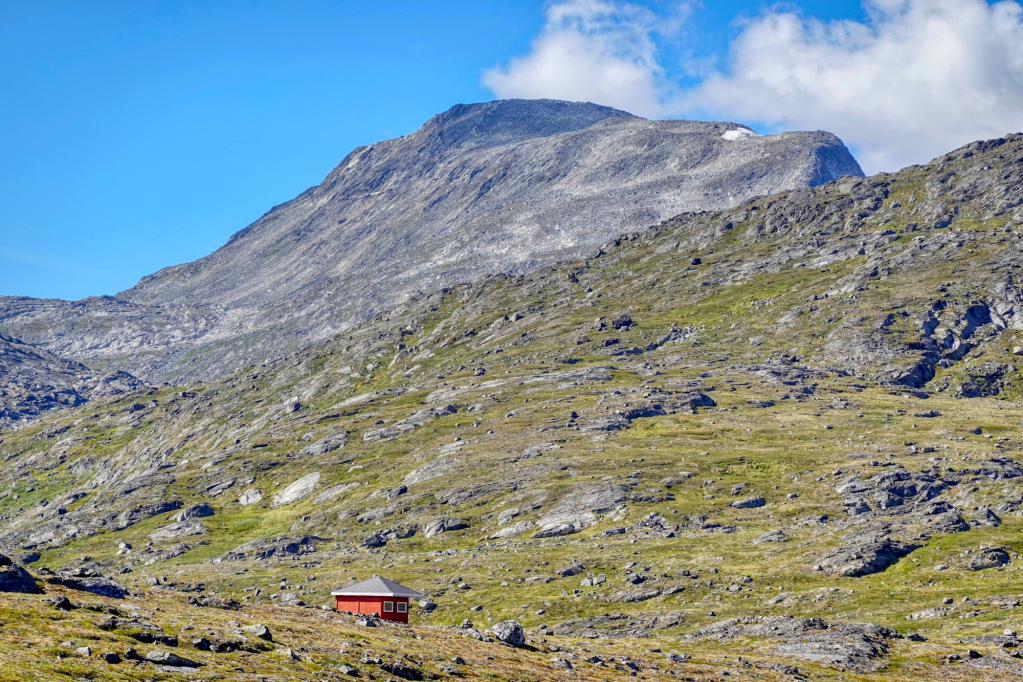
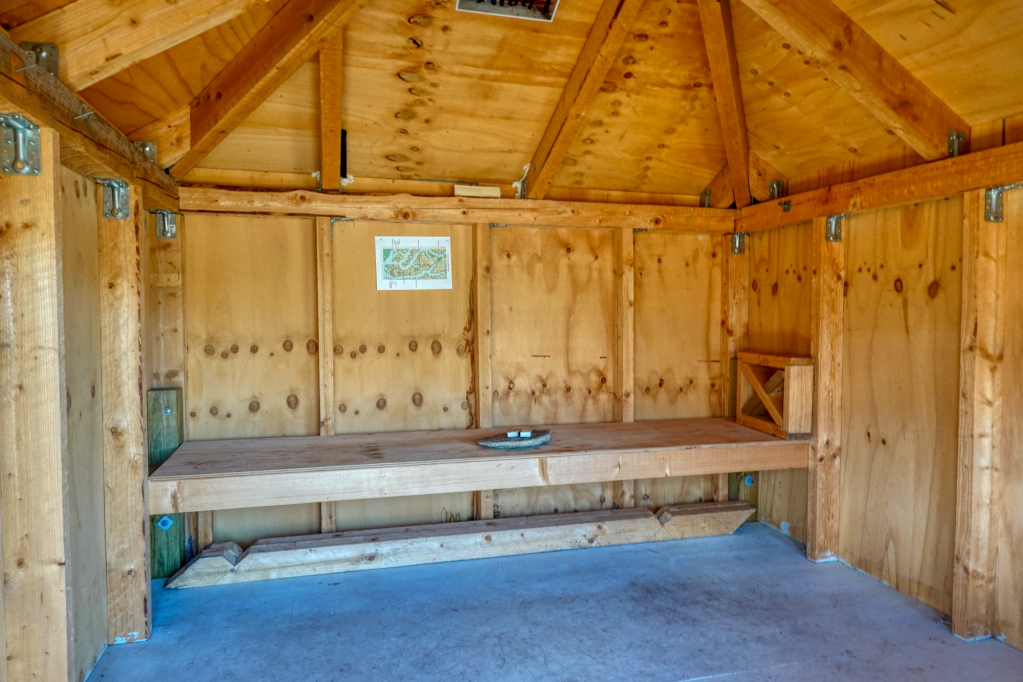
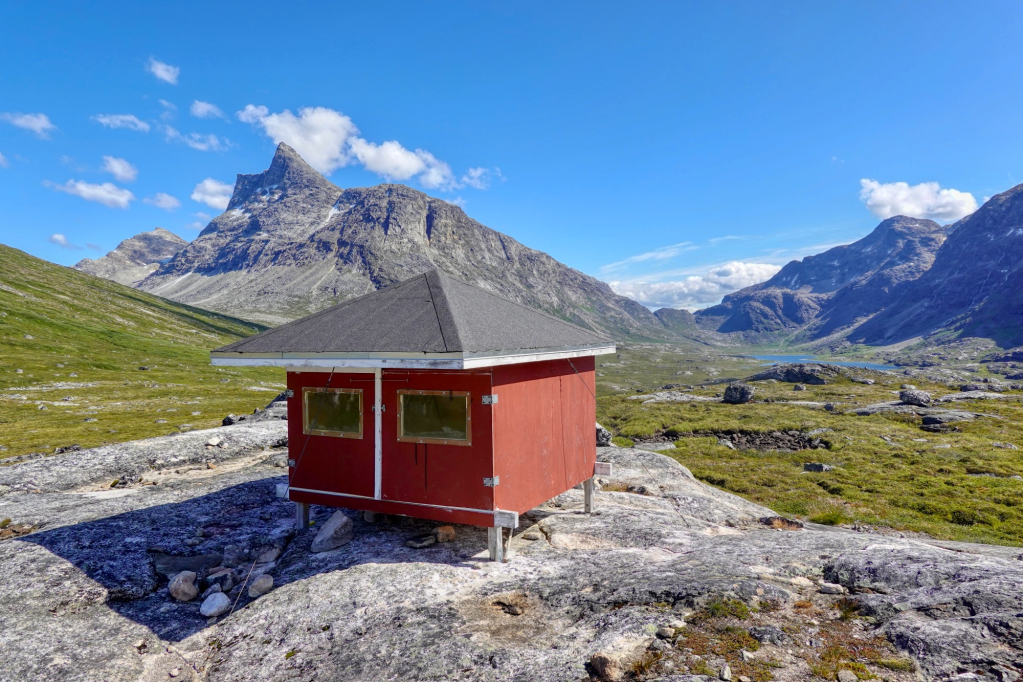
There are small shelters approximately every 20 km on this route. On the Nuuk side the shelters are right on the route, but on the Kapisillit side some of them are inconveniently far away from the route. The shelters are very small and very basic but clean and well maintained. It’s just an approximately 5 meters by 5 meters wooden box with a couple of doors with windows and a shelf. Nothing more. Unlike the ACT huts, there’s no table or kitchen or stove or toilet or anything (also no garbage). Like I said: just a small wooden box with doors. They will fit four people comfortably or five people if you squeeze in like sardines.
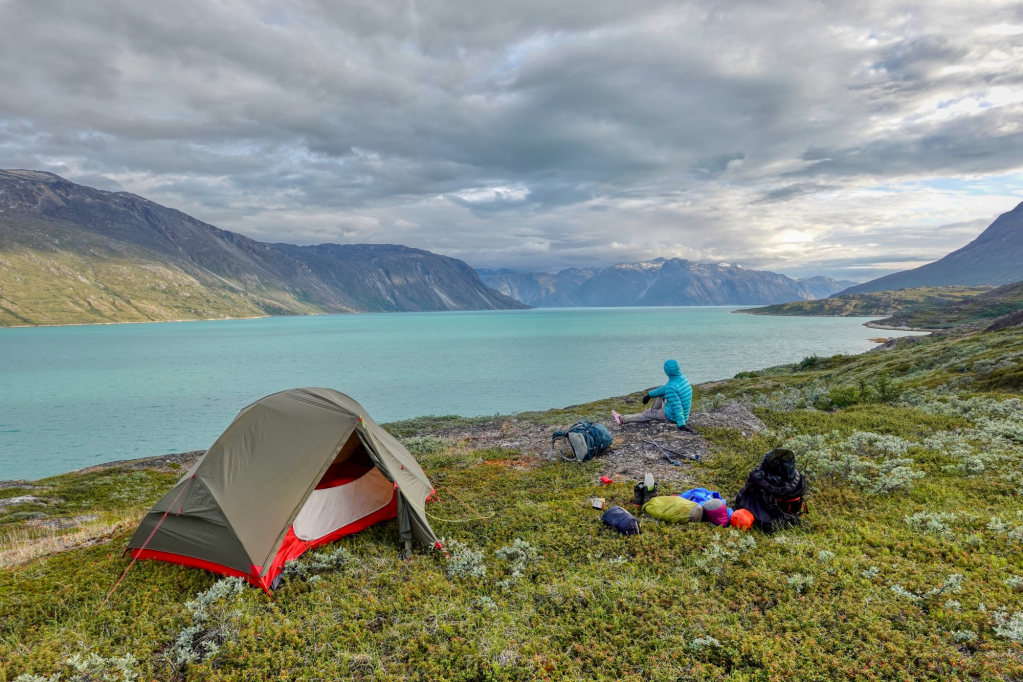
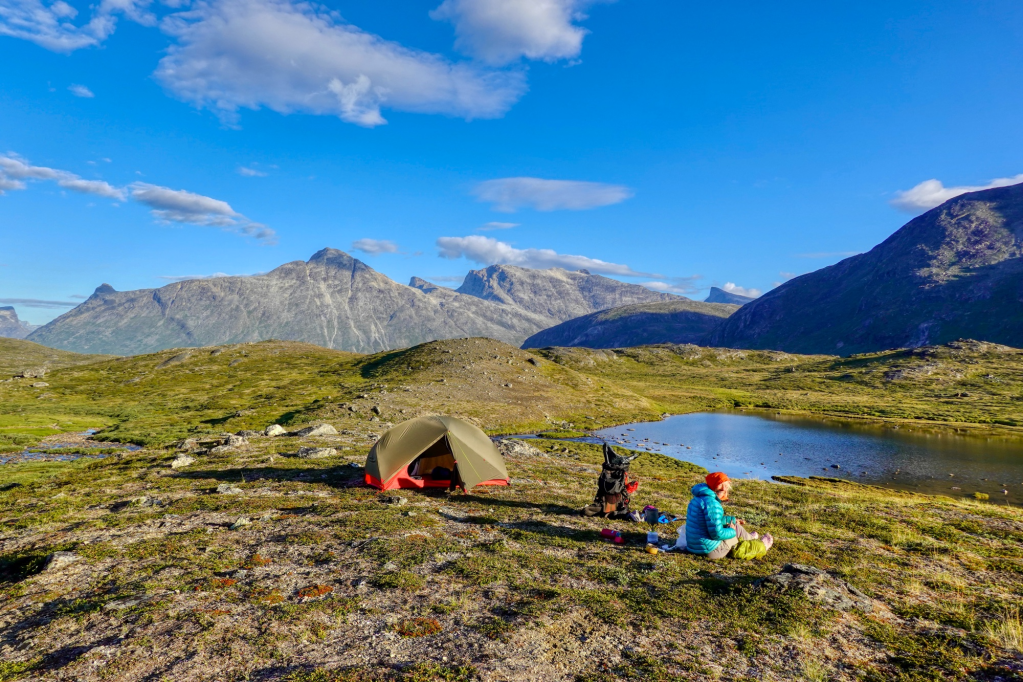
Many people opt to hike shelter to shelter. This trek is not (yet!) very popular, so it is quite likely that you will have the shelter to yourself. But you cannot count on this, and you must bring a tent just in case and also for safety. We chose to camp in our tent every night except the last night, just because we prefer to tent in solitude in beautiful locations next to lakes or rivers over staying in a shelter or even camping next to a shelter.
There is no cell phone coverage on most of the route (only very close to Nuuk or very close to Kapisillit). We would strongly recommend bringing an InReach or similar two-way satellite communication device. Not just to be able to contact rescue services in case of emergency, but also to get weather forecasts. During our trek, a gale-force storm passed through on the last night which our tent would not have survived if we had not stayed in a shelter that night. The weather changes very suddenly in these mountains; keep an eye on the weather forecast and plan to stay in a shelter if the winds are forecast to be extreme.
There are normally no polar bears on this route in summer but double check with locals for any sightings.
In case of emergency, you can make an early exit in either Qooqqut or Kangerluarsunnguaq. Qooqqut is on the Kapisillit side. It is a popular tourist destination for ‘catch your own fish and cook it’ tours from Nuuk. Kangerluarsunnguaq is a bay on the Nuuk side. It is reachable by boat; you can contact a boat charter operator (e.g. Nuuk Water Taxi) to arrange for a pickup. There is no cell phone coverage here, so note the phone number in your InReach before departure.
When to do the hike
We did the trek in early August, which we thought was a good time to do it. The ground is dry (no bogs) and the rivers are easily crossable. The snow is gone, except one snow wall that persists all year long (more about this later).
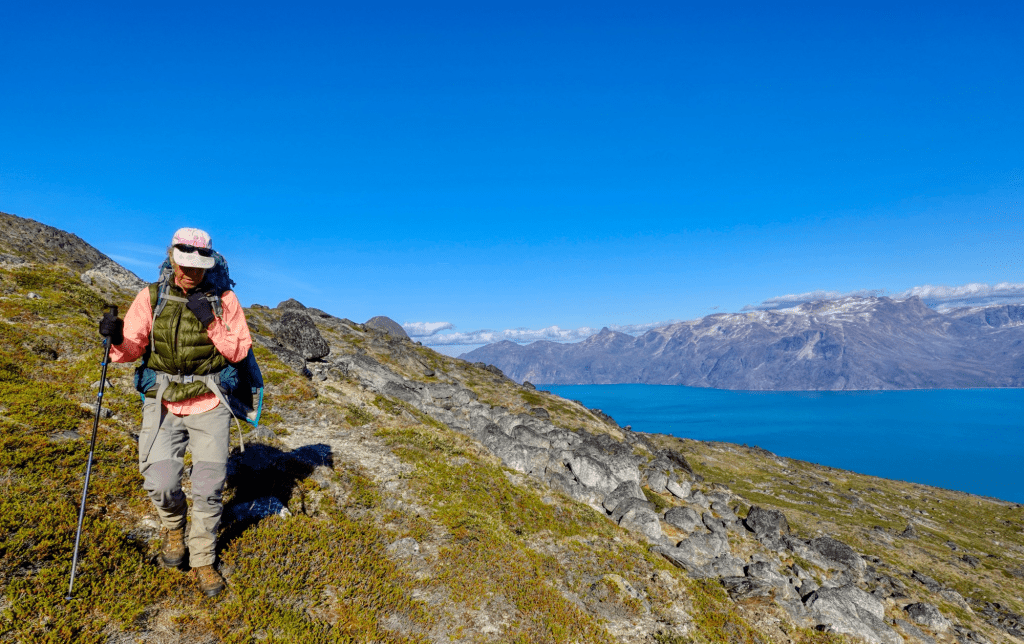
We were extremely lucky with the weather. We had blue skies and sunshine for seven out of eight days. Temperatures were around 10 to 15 Celsius during the day and around 5 Celsius during the night. During the last night, we had a gale-force storm pass through during the night, but it only lasted a few hours. Of course, your mileage may vary.
If you go a bit later, it will be a bit colder, but you will have fewer mosquitoes. We had a lot of them at the lower altitudes (don’t forget your mosquito net) although there were fewer of them higher up.

You can also go earlier. A good friend of ours, Rasmus Krøigaard, went on snow shoes in early June and wrote a blog about it.
Getting to or from Kapisillit
Disko Line offers a scheduled ferry service between Nuuk and Kapisillit. Check the schedule online; they do not go every day. It is strongly recommended to book far in advance because the boats are small and tend to fill up early, particularly in the high season of July and August.
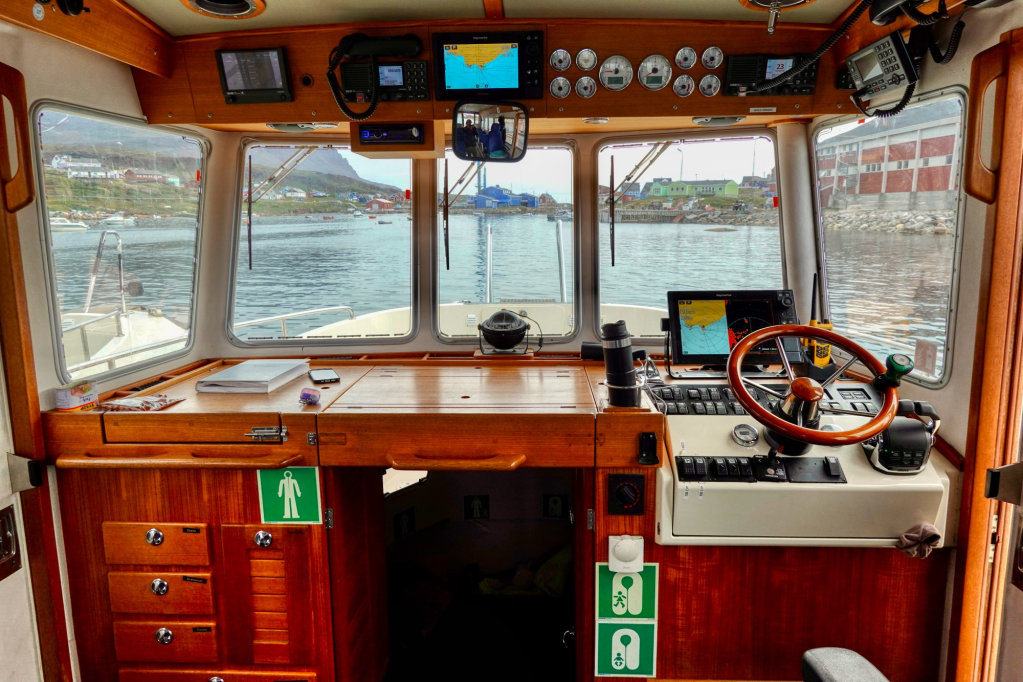
Most online descriptions describe this trek as going from Nuuk to Kapisillit and then taking a boat back to Nuuk. We opted to take the Disko Line ferry from Nuuk to Kapisillit and walk back to Nuuk. That way we had more flexibility – we did not have to arrive in Kapisillit on a particular date to catch the boat back.
You could also charter a boat to or from Kapisillit with any of the boat charter companies in Nuuk (e.g. Nuuk Water taxi). We have not checked the price but no doubt it is quite a bit more expensive than Disko Line.
Day 1: 30 July 2025
We took the Disko Line ferry from Nuuk to Kapisillit, departing at 9am and arriving at 11:15am.
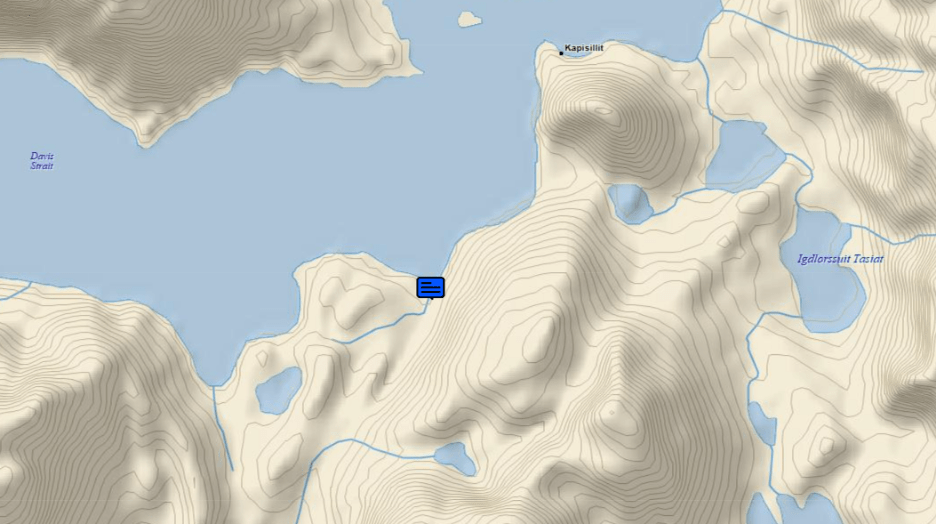
We got some ice creams at the Pilersuisoq, dropped off our heavy backpacks (outside, not inside, it closes at 3pm), and set of for the 8.3 km (each way) side-trip to the ice fjord (a fjord filled with small ice bergs) north-east of Kapisillit.
You can find the GPS tracks for the hike to the ice fjord on Wikiloc (you need the premium subscription to download the GPS track for offline use).
The trail heads out of Kapisillit on the south-east side of town and is clearly marked with pink dot markers.

The trail initially runs parallel to the coastline passing through the tiny settlement of Nuussuaq.

After a few km the trail goes up a small hill from where you can see two lakes: a small lake on your left and a larger lake on your right. The lakes are connected to each other and to the fjord by a river. From here, don’t follow the clear trail heading inland towards the larger lake. Instead, follow the fainter trail to where the river flows into the fjord; it is much easier to cross there. Hiking poles and river crossing shoes (crocs) come in handy here.
After crossing the river, the path continues further parallel along the coast until you reach some final vacation cabins and a small creek. This is your last reliable clean drinking water until you return here.

The trail veers inland, crosses some hills, and then traverses a big somewhat boggy grass plateau until you reach the ice fjord which is normally chock-full of small icebergs. Aim for the outcrop from where you will have a magnificent view.


Return to Kapisillit the same way you came.
We arrived back in Kapisillit in the late afternoon, picked up our backpacks, and started the trek to Nuuk.
The trail starts at the graveyard on the south side of town, not the road closest to the coast but the road higher up.
Once again, the path runs parallel to the coast, but this time in a south-bound direction. It’s not right on the coastline but some 100 to 150 meter up from the actual coast.

Soon the trail veers inward to climb over some steeper sections of coastline. Here, the trail is still very well-trodden, clear, and well-marked with yellow markers.
After about 3 km, the trail descends to the “beach”. I put beach in quotes because it’s not a sandy beach but a very rocky beach which can be tedious and tiresome to walk over (although not nearly as tiresome as some of the even more rocky beaches near the end of the trek on the Nuuk side).

After another 2.5 km, the trail reaches a small river streaming onto the beach. Here the route veers inland.
We camped here for the night; it is easy to find camping spots in this area. By the time we arrived it was already 9pm but still full daylight.
Campsite location: Lat 64.394366 Lon -50.317061
Day 2: 31 July 2025
After packing up the tent, we left the coast and turned inland in a south-westerly direction.
For the next 6 km you cross a grassy and sometimes a little bit boggy section. There are no trails whatsoever, and almost no yellow markers , but it’s kind of obvious which direction to go. Just follow the valley between the hills on the left and the right side, first slowly going up, and then slowly going down, until you reach the completely different fjord on the other side.

Once you reach the fjord on the other side, head down to the beach, which is again very rocky.


On the beach, head west and cross across an outcrop that sticks into the fjord. The outcrop is covered in dense birch bushes; there is a path through, but it’s not easy to find.
On the other side of the outcrop, another very long and very rocky stretch of beach awaits you.
Here you have some choices to make about how far you continue along this rocky beach; different GPS routes and different maps have different ideas.
Everyone agrees that you should first follow the beach towards the south-west for the first 4 km or so, until you reach two vacation cabins near a sandy “hook” that juts into the water.
There is also agreement that after another 4 km from this sandy hook, you have to make a 90 degree turn right and head north-west and up into a valley.
There are three options on what to do on those remaining kms between the sandy hook and the entry into the north-west valley.
1) Avenza maps suggest that you should continue to boulder hop along the coast until you reach the large outcrop (named “Aqajamerngit Nuuat” on the Avenza map) and then make a wide turn to ascend north-west the middle of the valley following the river.
2) The paper Mark T Hutchison map that I mentioned in the intro, has a route that runs parallel to the coastline about 500 meters inland. It also crosses the large outcrop and heads into the valley along the river.
3) The GPS track posted on the Visit Nuuk website, heads much higher and much more inland from the sandy hook, presumably towards a plateau that avoids bushes, cliffs, and canyons. We also think the yellow dots are here, but we are not sure (we did not take this route). It then veers into the valley much more to the right of the river.
Each of these options has its own problems – pick your poison. If you follow the coastline itself, you have a lot of tiring boulder-hopping to do. If you walk parallel to the coastline just a few hundred meters inland, you have a lot of bush-whacking to do fight your way through the very dense birch bushes. If you go much further inland and up there are fewer bushes but now you have a lot of climbing to do.
We started out boulder-hopping on the beach, got tired of it, and then went a little bit inland.
We met a group of hikers who were walking from Qooqqut to Kapisillit, who pointed out that for the next couple of kms there was a crystal-clear nice well-trodden trail that would take us to a bible camp full of young kids.

Helas, after the bible camp the nice trail disappeared – it was back to bush-whacking in dense birch bushes.
After about 2 hours of this (it was about 8pm by then) we were exhausted and started looking for a camp site. Unfortunately, it took us quite a bit more time to finally find a suitably flat spot amongst the bushes that also had a puddle of water that looked good enough for drinking. Ironically, the next day when we continued, we found several creeks with crystal-clear water not five minutes further.
But never mind the effort – the campsite had an amazing view over the fjord and the weather was fine, it was delightful.
Campsite location: Lat 64.284063 Lon -50.526681

Day 3: 1 August 2025
We woke up to blue skies and had breakfast.
From the camp site, we started climbing higher and higher in an attempt to get out of the bushes. Typically in Greenland, the higher you go, the grassier and the less bushy it is.
But because we needed to avoid some minor cliffs and canyons on the way up, we ended up doing a lot of back-and-forth before we finally made it to the entrance of the north-west climbing valley that we were aiming for.

We did not see any yellow markers on our chosen route, so in retrospect we suspect that option #3 mentioned above would have been easier and is probably the marked route. But again, since we did not go there, we are not sure of this.
Whatever option you choose, you will eventually round the corner around a 1250 m high mountain (“Aqajamerngit Qulaat”) and find yourself going up north-west into the valley, parallel to a river, climbing to a scenic plateau at around 450 m.
We had taken a higher route, so we saw the river below and to the left of us in the valley, and we ascended north-west up into the valley diagonally traversing up the slopes on the right side of the valley. This was some work, but otherwise easy and straightforward without significant obstacles.
After climbing up the valley for about 3 km, you reach the plateau at about 450 meters. Soon after, you will see a tiny shelter on top of an outcrop.
We did not go to the shelter, but already turned left in front of it, heading in a south-westerly direction again.
The next 10 km are very scenic. It is a leisurely walk along a series of four lakes on following a mostly flat valley with beautiful mountains on both the left and the right side.
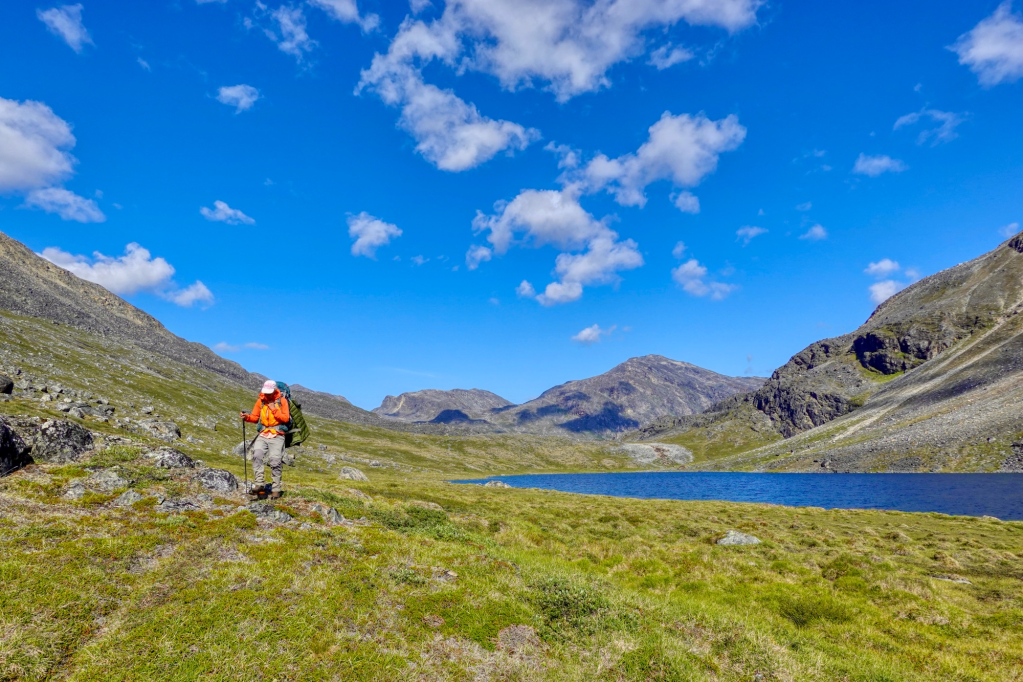
You first pass one long lake, then after some time, an even longer lake connected with a small lake right next to it, and then after a slight descent a fourth medium sized lake.
Note that after the third lake, the official marked route veers off north to Qooqqut and then from Qooqqut another trail connects back to just beyond the fourth lake. Since we skipped Qooqqut village, we short-cutted directly from the third to the fourth lake.
We set up camp on the ridge just before the final fourth lake.
Campsite location: Lat 64.239571 Lon -50.809428

Day 4: 2 August 2025
Another day of very fine weather: blue skies and pleasant breeze.
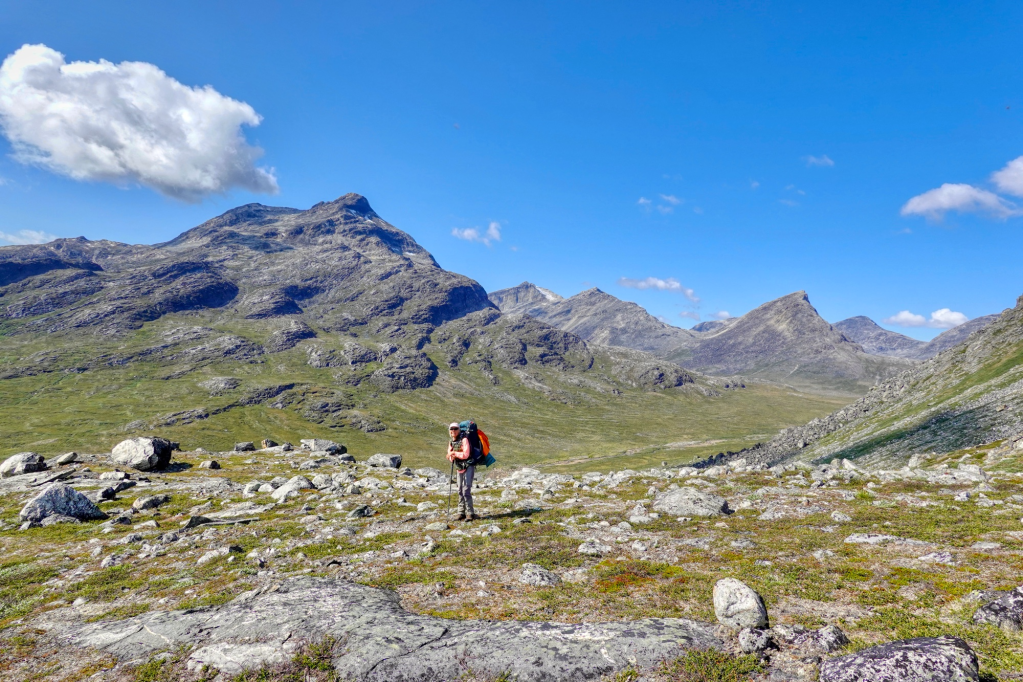
The day in front of us has a bit more up and down than the previous days but turns out to be pleasant hiking over relatively easy terrain without bushes, bogs, rocks, or other major obstacles, and fine mountain views all around.
From our campsite at an altitude of about 200 meters we head in a south-westerly direction over a wide grassy plain surrounded by high mountain peaks in all directions. After 3 km we pick up the yellow markers and we rejoin the official trail that made a detour to Qooqqut.
As we continue south-west, we enter an increasingly narrow valley. For the next 2 km we start gaining altitude until we reach a small lake at the top around 570 meters altitude.
Continuing south-west, we start descending into a valley on the other side, towards a series of more small lakes which we can already see below us in the distance.


It’s another 3.5 km until we reach the last of these lakes at an altitude of 280 meters. Nearby we find a shelter. It is a tiny box, perhaps 5 by 5 meters, with large doors in front. It is simple but functional, well maintained, and clean without any garbage.
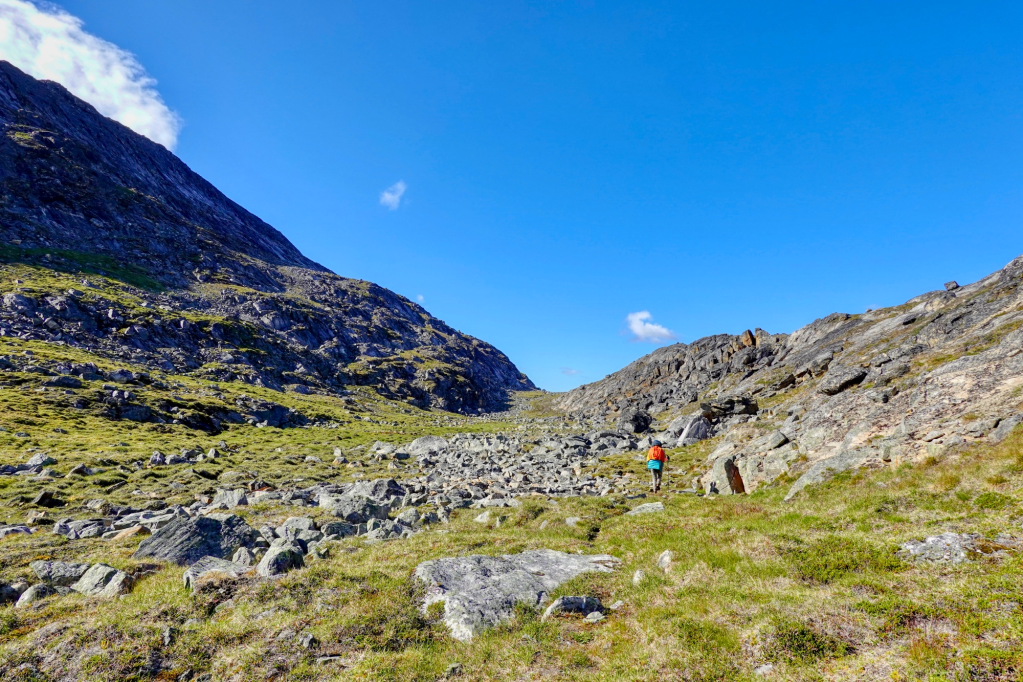
From here we start a long (about 6 km) and increasingly steep ascent back up to 700 meters altitude. There is no clear trail, and the yellow markers are sometimes difficult to locate, so we have to consult the GPS track on our phone to stay on track. Try to stay on the marked route as it is more difficult off-route.
But despite the challenges, it’s a beautiful section, passing some nice lakes and with great views of the fjords below and the mountains all around.


Once we reach the top at 700 meters, the last couple of kms are an interesting traverse following the 700 meters contour line along the slope of a mountain. Once again, there splendid views of the fjord deep below on the left.
At the end of the contour we descend a little bit and reach a splendid small lake nestled in a saddle between the high mountain peaks left and right.
It makes for a very fine camping spot and we set up the tent for the night.

Campsite location: Lat 64.145533 Lon -51.036580

Day 5: 3 August 2025
The next morning we wake up to an interesting phenomenon: our little lake in the saddle is basking in the bright sun, but the fjords and valleys all around us are covered in an undercast of very dense fog. Amazingly beautiful.
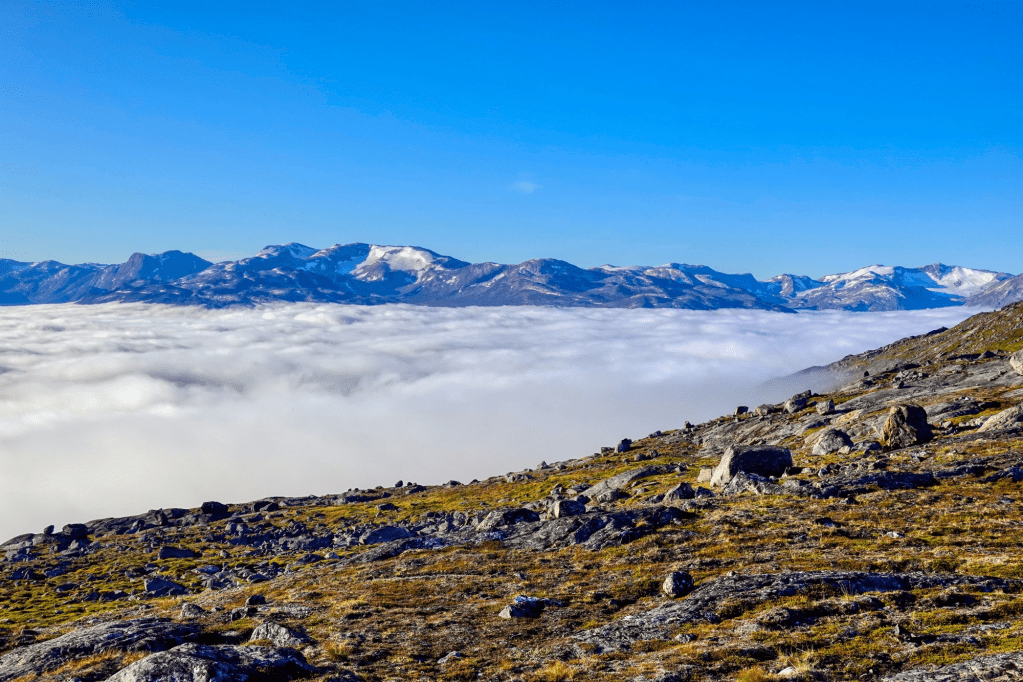
Hoping that the fog will clear up a bit before we descend into the next valley, we take our sweet time for breakfast. Indeed the fog clears up a bit; not much, but enough to navigate.

After breaking up camp, we head over to the edge of our little saddle on the other side. We are shocked by the steep, almost vertical, cliff down on the other side. We cannot even see the bottom through the fog, but it is a couple of hundred meters at least. Surely, we are not expected to go down this? It seems impossible.
We see some yellow markers, so we know which way we are supposed to go. The markers first go west, a bit further up the mountain, before plunging down into the valley about 200 meters below. The route is incredibly steep, but as long as you follow the yellow markers exactly, it is perfectly safe without any major exposure.

The valley at the bottom is shrouded in a dense fog. It makes for a very mysterious atmosphere. Luckily, we can still find the yellow markers to locate the route because the geography in this part is very confusing.

Suddenly, out of nowhere a pair of Danish hikers appears. They must be a very fit bunch, because they are aiming to reach shelter number 2 that same day, which we will only reach two days later.
First, we have to do a couple of easy river fords to get to the other side of the valley towards the west.
Once on the other side, we have to go up. But in the fog we are having some difficulties finding the exact spot where we are supposed to go up. We end up losing the yellow markers and going up at a rather steep and rocky spot.
We continue to go left (west), contour around the mountain, and end up in a valley below us on the left. We continue going up this valley until we reach a plateau with a big cairn and yellow markers again confirming we are in the right place.
At this point we are still no more than a few kms away from yesterday’s camping spot.
From this plateau, we first head south-west and then turn towards the west, with the mountains on our right and the valley on our left.
We slowly descend into a stunningly beautiful valley. The valley is about 1 km wide and 5 km long. It is surrounded by gorgeously beautiful mountains on both sides. For the next couple of hours we will follow the river that flows through the middle of it.
Shortly after entering the valley and reaching the side of the river, we pass a series of waterfalls where we stop for lunch.
Most of the valley is easy walking and ascends only very gradually from 400 to 550 meters altitude.

But when you reach the head of the valley, where the river originates from a small glacier, the last 200 meters of ascent from 550 to 750 meters are very steep, extremely rocky, and very difficult going. It takes quite a bit of effort to get up there, but it’s just hard work, not dangerous or anything.
Once you reach the top, you enter a scenic plateau of very barren granite. Up on the right, there is another small shelter, but we did not go and check it out.

The barren plateau is mostly flat and continues for another km or so before you reach the biggest challenge of the whole trek.
You run into a steep snow wall that you have to cross. It appears that the snow wall is permanent, i.e. it is there for the whole year and never melts away. It blocks the whole valley from one side to the other side of the valley. You have to cross it; there is no easy way to avoid it. The snow wall is eye-ball estimate about 50 meters high and very steep. Going from Kapisillit to Nuuk you have to descend it and going from Nuuk to Kapisillit you have to ascend it. It is, no doubt, the trickiest part of the whole trek.
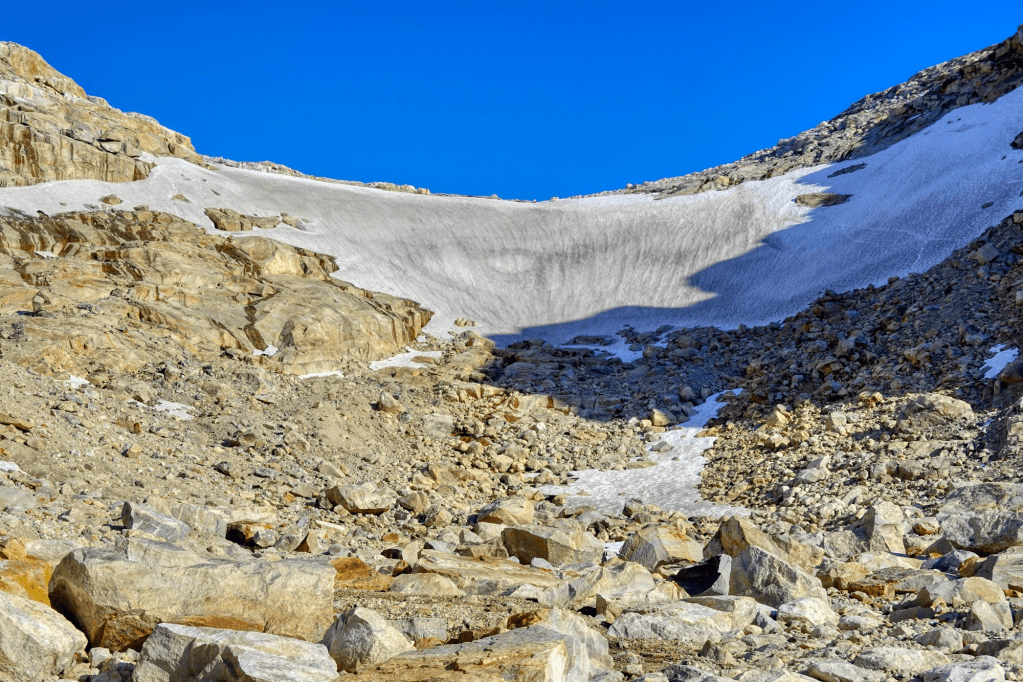
There are a couple of ways to tackle it:
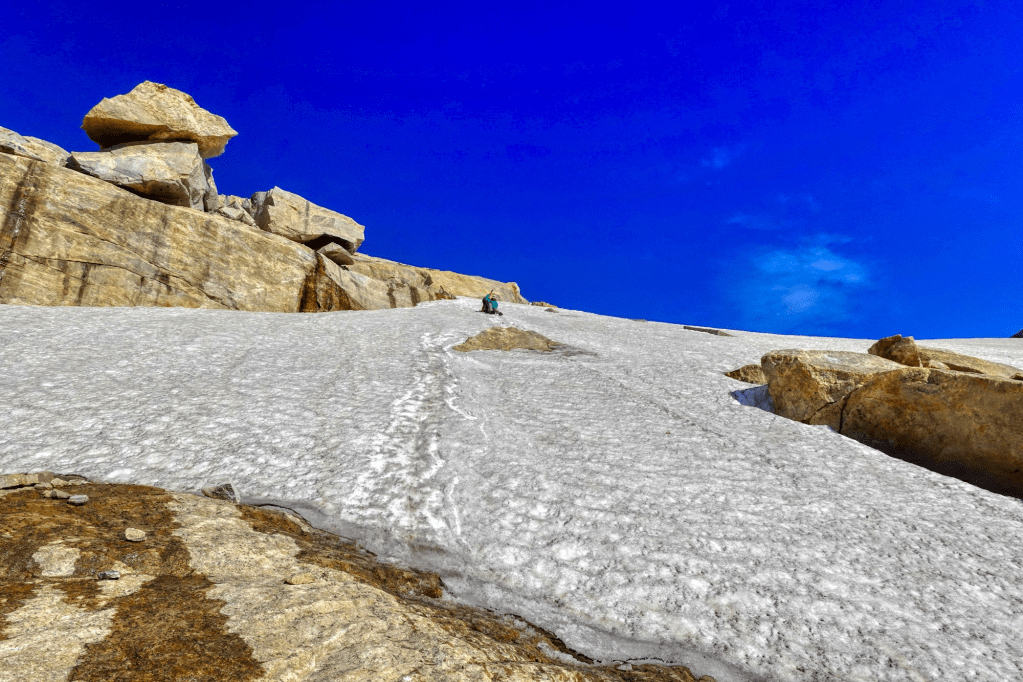
1) The most common option (best for folks going from Nuuk to Kapisillit, i.e., going up the snow wall) is to go to the far right of the valley (facing up), and simply walk up the snow, first sticking to the right and the slowly traversing over towards the left once you are almost at the top. After we had setup camp below the snow wall, we saw two other hikers do this (see photos below). And the tracks on the snow seemed to indicate other people had done it as well. This requires experience and confidence. You really have to kick your feet hard into the packed snow to get a good foothold. It seemed to me that spikes and poles would be very helpful, or even full crampons and an ice ax if you want to make it perfectly safe. If you lose your footing and slide down, it is steep enough to potentially cause seriously harm. But spikes, crampons, or an ice ax add a lot of weight, and you don’t need them anywhere else on the trek (at least not in early August; a June hike as described Rasmus’s blog is a different matter.)

2) Another option (best for the folks going from Kapisillit to Nuuk, i.e., going down the snow wall) is to go to the far right at the top (this time facing down) and first cross the rocky slabs on the right side (facing down) of the snow. This allows you to enter the snow at a much lower point, where you can safely walk or butt-slide down the snow using your heels to self-arrest and avoid gaining speed as you scuttle down. However, crossing the rocky slabs is also not easy and also requires great care and a good head for heights. This is the route that the GPS tracks on the Visit Nuuk website indicates, and it is the route that we took. We managed, but not without some trepidation.
Like I said, we found this to be the trickiest part of the whole trek. I don’t want to scare people out of the trek, but make sure you have the experience and the courage to do this, otherwise it is a long way back. That said, clearly lots and lots of people have made it through this part, so just be careful and take your time.
Right below the snow wall is a very cute and scenic tiny little lake at 620 m altitude. We setup camp at a perfectly flat spot right on the edge of the lake where the melt water from the snow enters the lake.

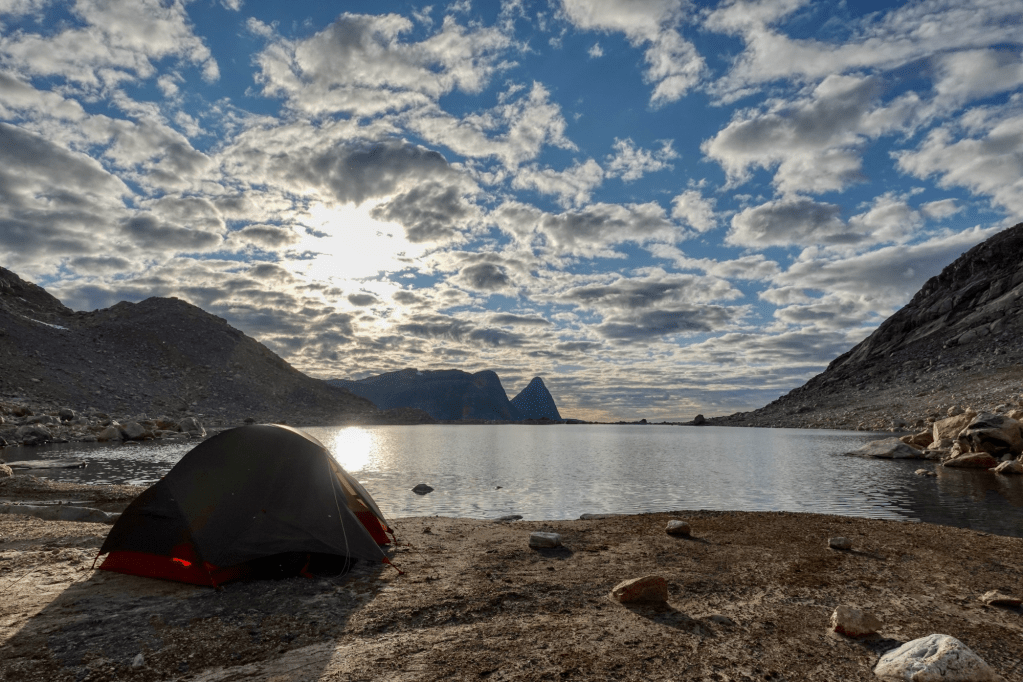
Campsite location: Lat 64.158933 Lon -51.252573
Day 6: 4 August 2025
We greeted yet another day of bright blue skies the next morning.
The very first order of the day is to descend from the cute lake to a much bigger lake. The descent is about 2 km distance and about 350 meters vertical. The terrain almost just as rocky as the final ascent yesterday, but it is quite a bit easier as you are going down this time.

At the bottom of the descent you reach the much bigger Qassi lake at 280 m.
The next 5 km are an easy descent over grassy slopes heading back down to the fjord.
About 1 km before reaching the fjord you pass shelter number 3, which looks just the same as the other ones we passed before.
According to the official trail you’re supposed to go down to where the river enters Kangerluarsunnguaq bay and turn right onto the beach. Unless you plan to catch a boat, there is really no reason to, and you can instead stay high, curve right around the mountain, and slowly descend to the beach to enter it much later.
Once you reach the fjord, it’s another 8 km of boulder-hopping along the beach. This time the boulder hopping is quite a bit more difficult than what you did on day 1 on the Kapisillit side. The beach tends to be narrower, and the boulders tend to be larger and more difficult to cross.

It is possible to pass these beaches at high tide, but it a lot easier to pass them at low tide. So, it is worthwhile to look up the tide tables before you start your trek and try to time the beach traverse for low tide.
After the 8 km beach traverse, there will be a difficult 1 km section of huge boulders to cross. It would have been quite exhausting for us to tackle all of that onto day 6. So, we decided to break the day in the middle of the beach section.
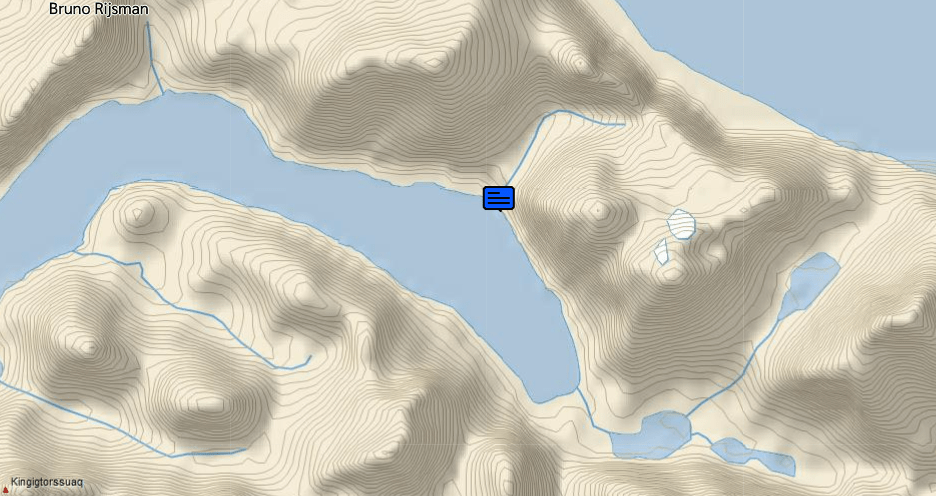
It is nearly impossible to find a camping spot on the beach section, but there happens to be a good camping spot after about 4 km on the beach. Here, you cross the second large river (the first one is a water fall about 2 km earlier). There is a corner in the fjord on the map. You can recognize the spot by the big granite slab next to the river with a bright red life preserver at the bottom of it (see photo). If you go up the granite slab for a about 30 m distance, there is a nice flat camping spot on the right side of the granite slab. We put up camp for the night in this spot.


Campsite location: Lat 64.166625 Lon: -51.411875
Day 7: 5 August 2025
The weather gods are still with us: yet another day of bright sunshine, light clouds, and light winds.
We finish the remaining 4 km of boulder hopping along the beach.

The next 2.5 km of the route continues parallel to the beach, but for most of it a bit more inland because the beach is now too steep and narrow to cross.
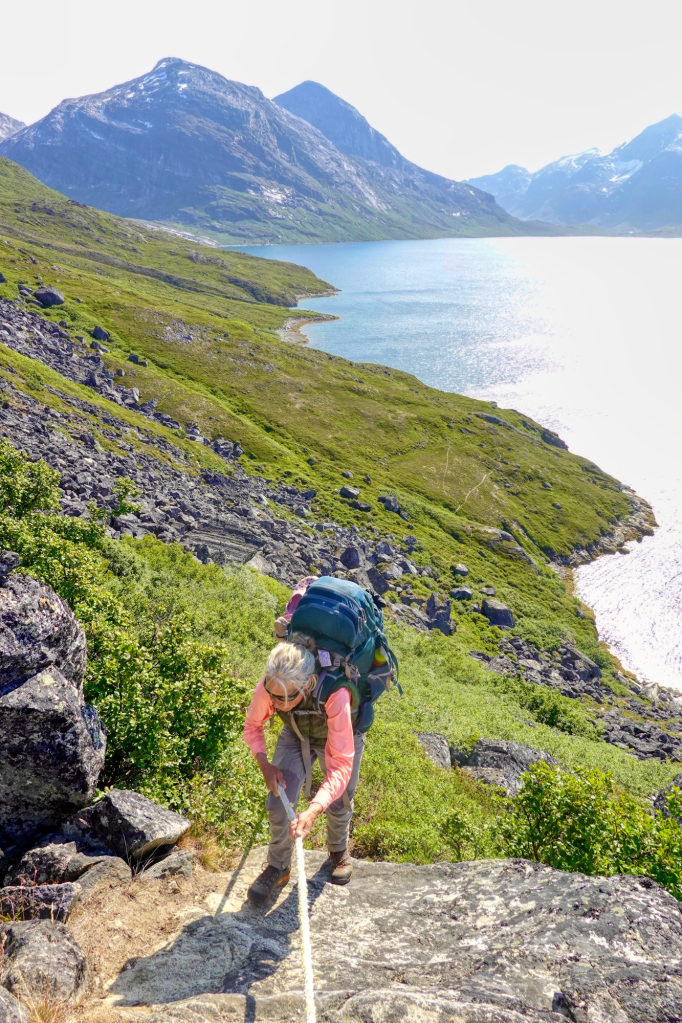
And then, for the next 1.5 km or so you run into the famous and feared boulder field. Here the rocks are huge: they vary in size from the size of refrigerator to the size of a truck. The trail goes up quite a bit to avoid the worst of it at the bottom. It weaves through the rocks, and in a few places, you have to scramble over the rocks. The path is extremely well marked with lots of yellow arrows and ropes (you don’t need the ropes for climbing, they are mostly there to indicate where to go). We had heard much about this section of the trail, but to be honest it was much easier and far less scary than we had feared. In fact, it was quite a bit of fun!
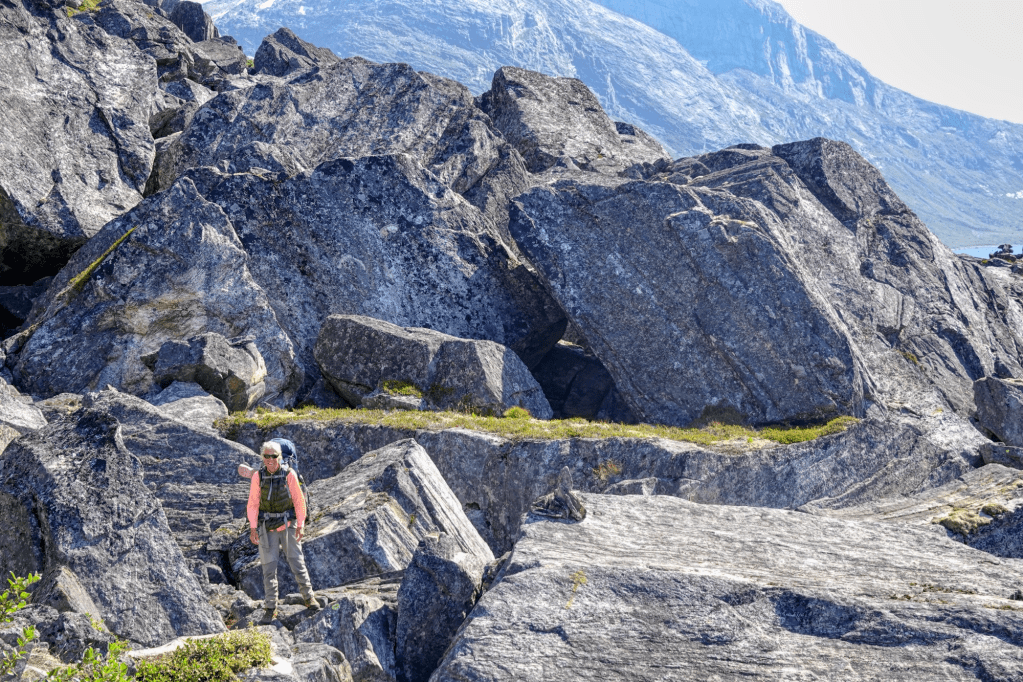
At the end of the “field of rocks” section there is a hut below next to the water. We did not visit the hut up close, but it looks quite a bit larger than all of the other huts on the trek.

The next 2 km you continue west, parallel to the coast. But now, the ground is grassy without any bushes, and the trail is easy.
Then, you turn to the north-west, entering a very broad grassy valley sloping slightly up. In this section, there is no trail, and the markers are few and far between. But it is obvious where to go – just go up the valley, aiming for the left side on at the top.
After another 2 km or so, you reach the top of the valley before it heads down again towards the fjord on the other side.
Here, you have to make a steep ascent up onto the granite slope on the left side. The ascent is easy and very well marked with yellow markers.

At the top of the ascent you find yet another small boxy shelter, namely shelter number 1.

We had originally planned to continue for another few kms and camp at a small lake. However, the weather forecast on our InReach predicted a brief but strong storm (more than 55 km/h) for that night. Our tent (a MSR Hubba Hubba NX) is not the best in strong winds, so we decided to spend the night in the small shelter.
We were joined by a group of three young hikers, who originally put up their tent next to the shelter, but moved into the hut around midnight when the winds really started going.

In the end, we did not regret staying in the shelter. It was located in an amazing spot, on an outcrop right on the edge of the steep side of the mountain, with the most mind-blowing views of the mountains. We could sit with the doors open, out of the wind, enjoying the spectacle in front of us.

Shelter location: Lat 64.199435 Lon: -51.548795

Day 8: 6 August 2025
During the night, the howling winds picked up to the point that the whole shelter was shaking, and in the early morning there were a few bouts of torrential downpours. But by the morning, both the winds and the rain had passed. The only weather remaining was a dense fog.
We waited for the worst of the fog to lift and got going at around 10 am.
It only took us a few hours of easy hiking through the granite mountains with a few minor ups and downs to reach the satellite antenna field next to the Nuuk airport.
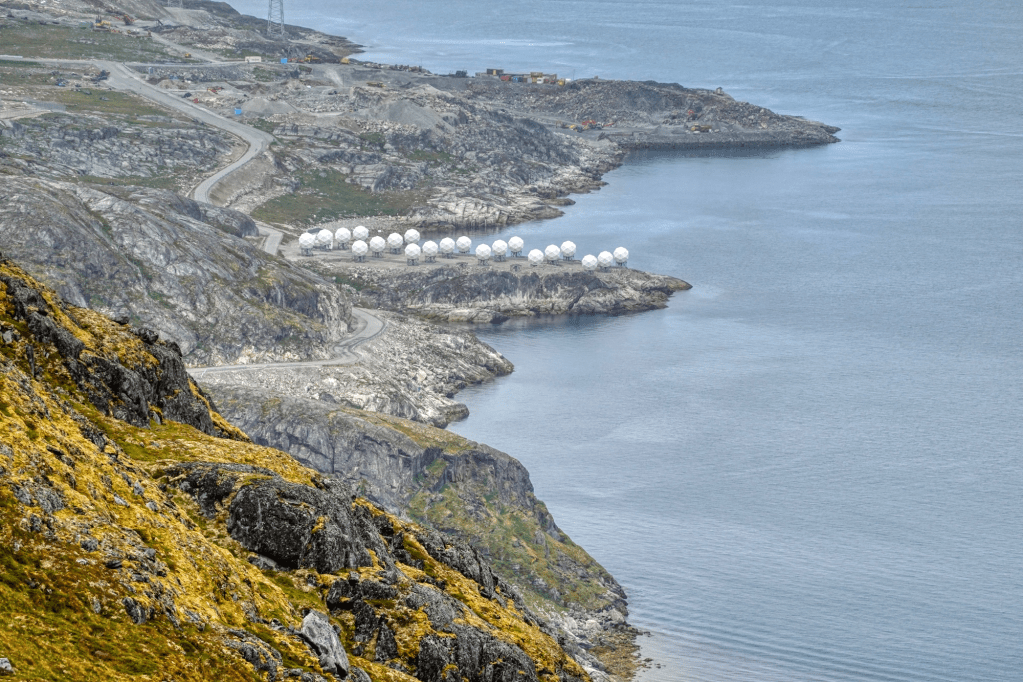
Here we had cell phone coverage again, and we called a taxi (phone number +299 363636) to bring us to our hotel in the center of Nuuk.

